User flows
- main flowchart diagram
- Login Page
- Forget Password Flow
- Signup Page and Onboarding flow
- AI Campaign Onboarding Flow
- Email Validator
- Accounts page
- Purchase flow
- Campaign
- ALL flows in detail
main flowchart diagram

Login Page

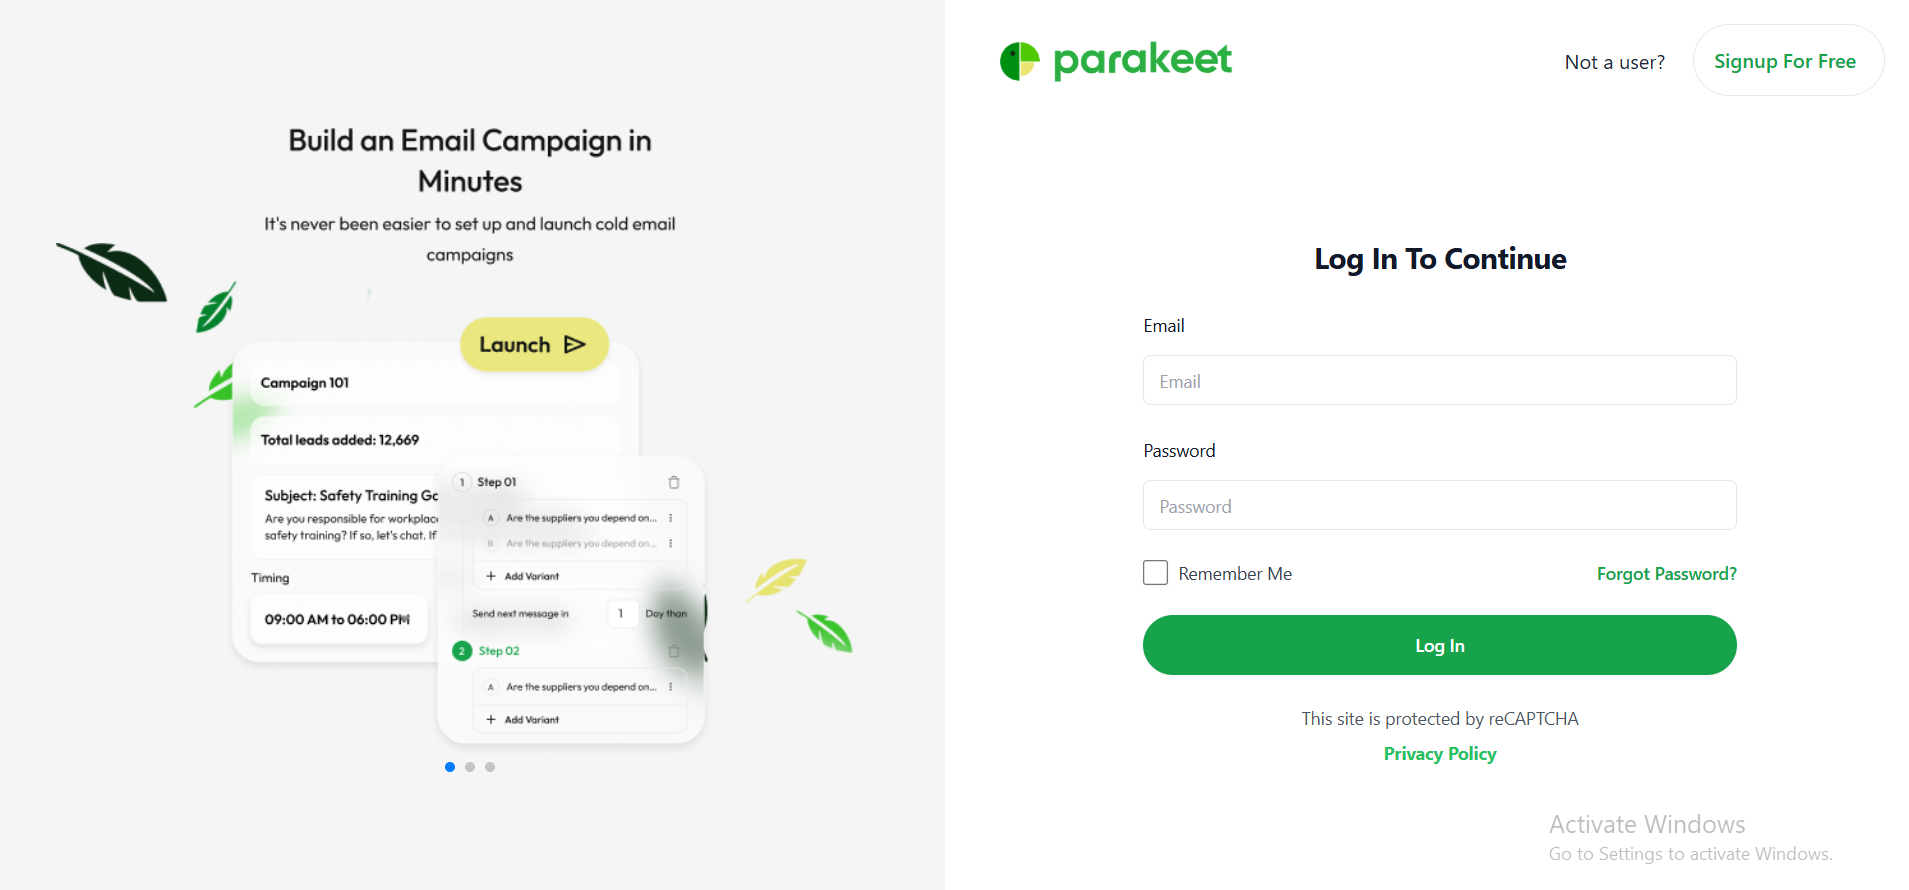
1. Login Flow
Purpose
This flow allows existing users to securely access their Parakeet dashboard and campaign tools by logging into their accounts.
Flow Steps
-
The user navigates to the login page:
auth/login
-
The user is prompted to enter the following credentials:
-
Email address
user@example.com -
Password
******** -
After entering valid credentials, the user clicks the Login button.
-
-
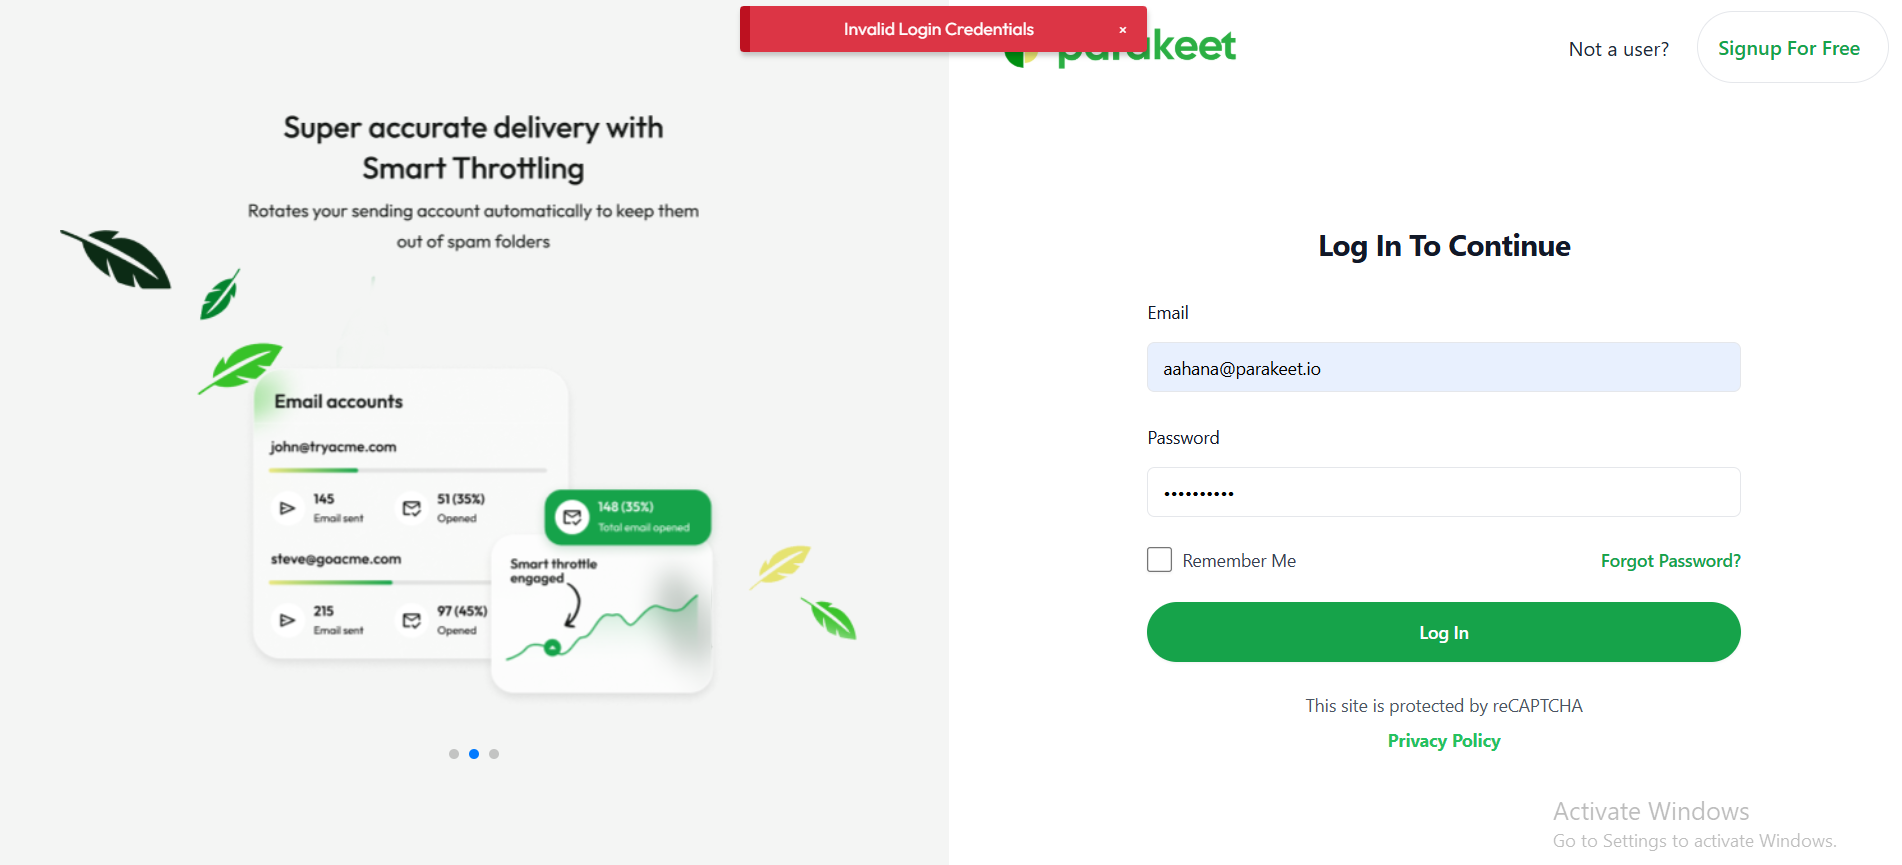
The system verifies the credentials:
-
If valid, the user is redirected to:
/dashboard
-
If invalid, an error notification is displayed:
"Invalid credentials. Please try again."
-
-
Depending on the context or prior user action, the user may be redirected to:
-
The Dashboard (if the user has an active account)
-
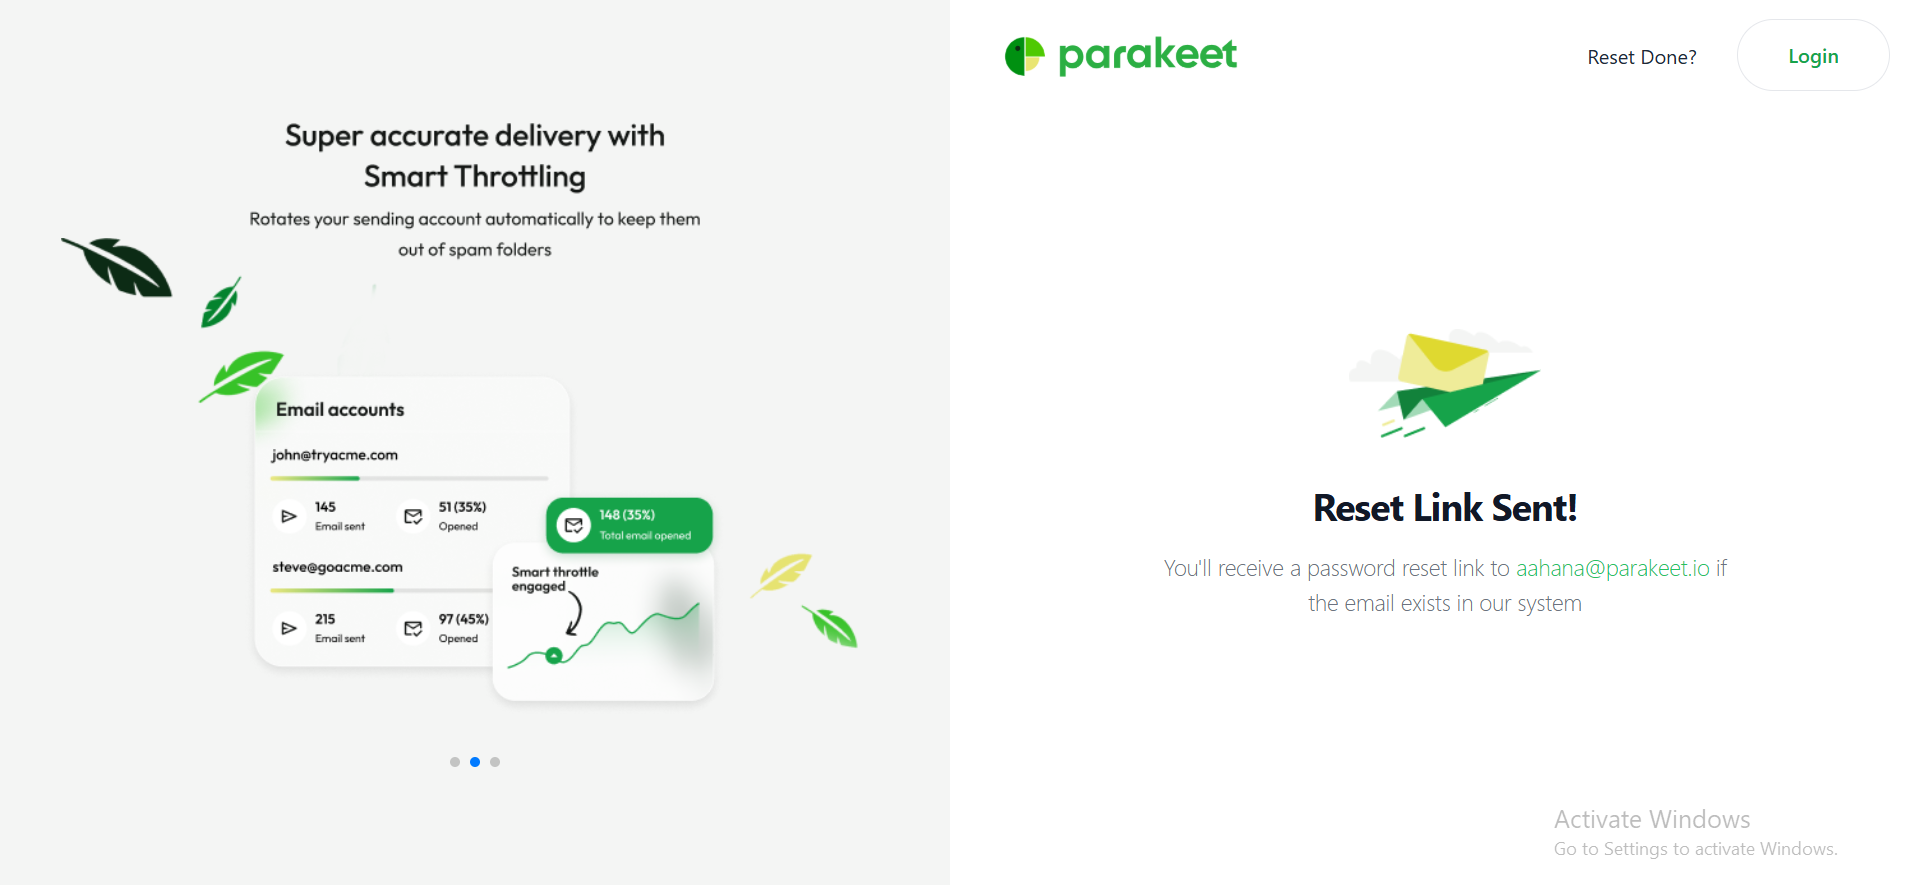
Forget Password Flow

Purpose
This flow enables users who have forgotten their credentials to securely reset their password and regain access to their account.
Flow Steps
-
The user clicks on the "Forgot Password" link on the login page.
-
The user is redirected to the Password Reset Request Page:
auth/forgot-password
-
The user is prompted to enter the email address associated with their account.
-
Upon entering a valid email address, the user clicks the "Send Password Reset Link" button.
-
After submission, the button changes to indicate that a reset email has been sent.
-
Further inputs are disabled, and the user is instructed to check their email inbox.

-
-
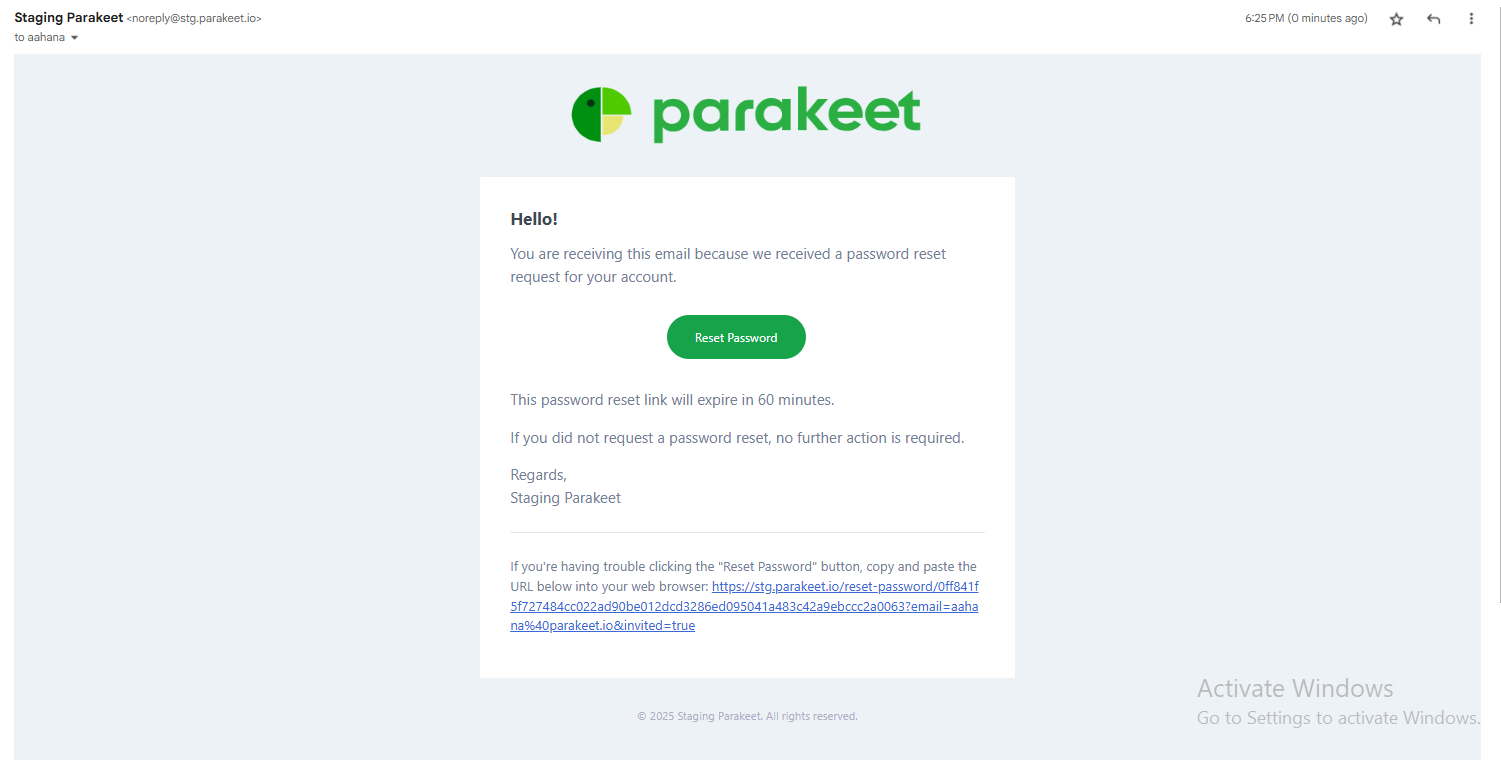
The user receives an email containing a password reset link.

-
Clicking the reset link redirects the user to the following route:
auth/forgot-password/{{user-specific-token}} -
The Reset Password Page includes the following fields:
-
Email Address (pre-filled)
-
New Password
-
Confirm Password

-
-
Once the user clicks the "Reset Password" button:
-
The system displays a message: "Password changed successfully."
-
The user is redirected back to the login page to authenticate using their new credentials.

-


Signup Page and Onboarding flow

3. Sign-Up Flow
Purpose
The sign-up flow registers new users and initiates a personalized onboarding sequence, guiding them toward setting up their first campaign effectively.
Flow Steps
-
The user visits the Sign-Up Page:
/signup
-
The user is prompted to enter:
-
A valid email address
-
A secure password
-
-
The user clicks on the Sign Up button.
-
System triggers the following actions:
-
New account creation
-
Automatic transition into the onboarding sequence
-

Onboarding Sequence (Post Sign-Up)
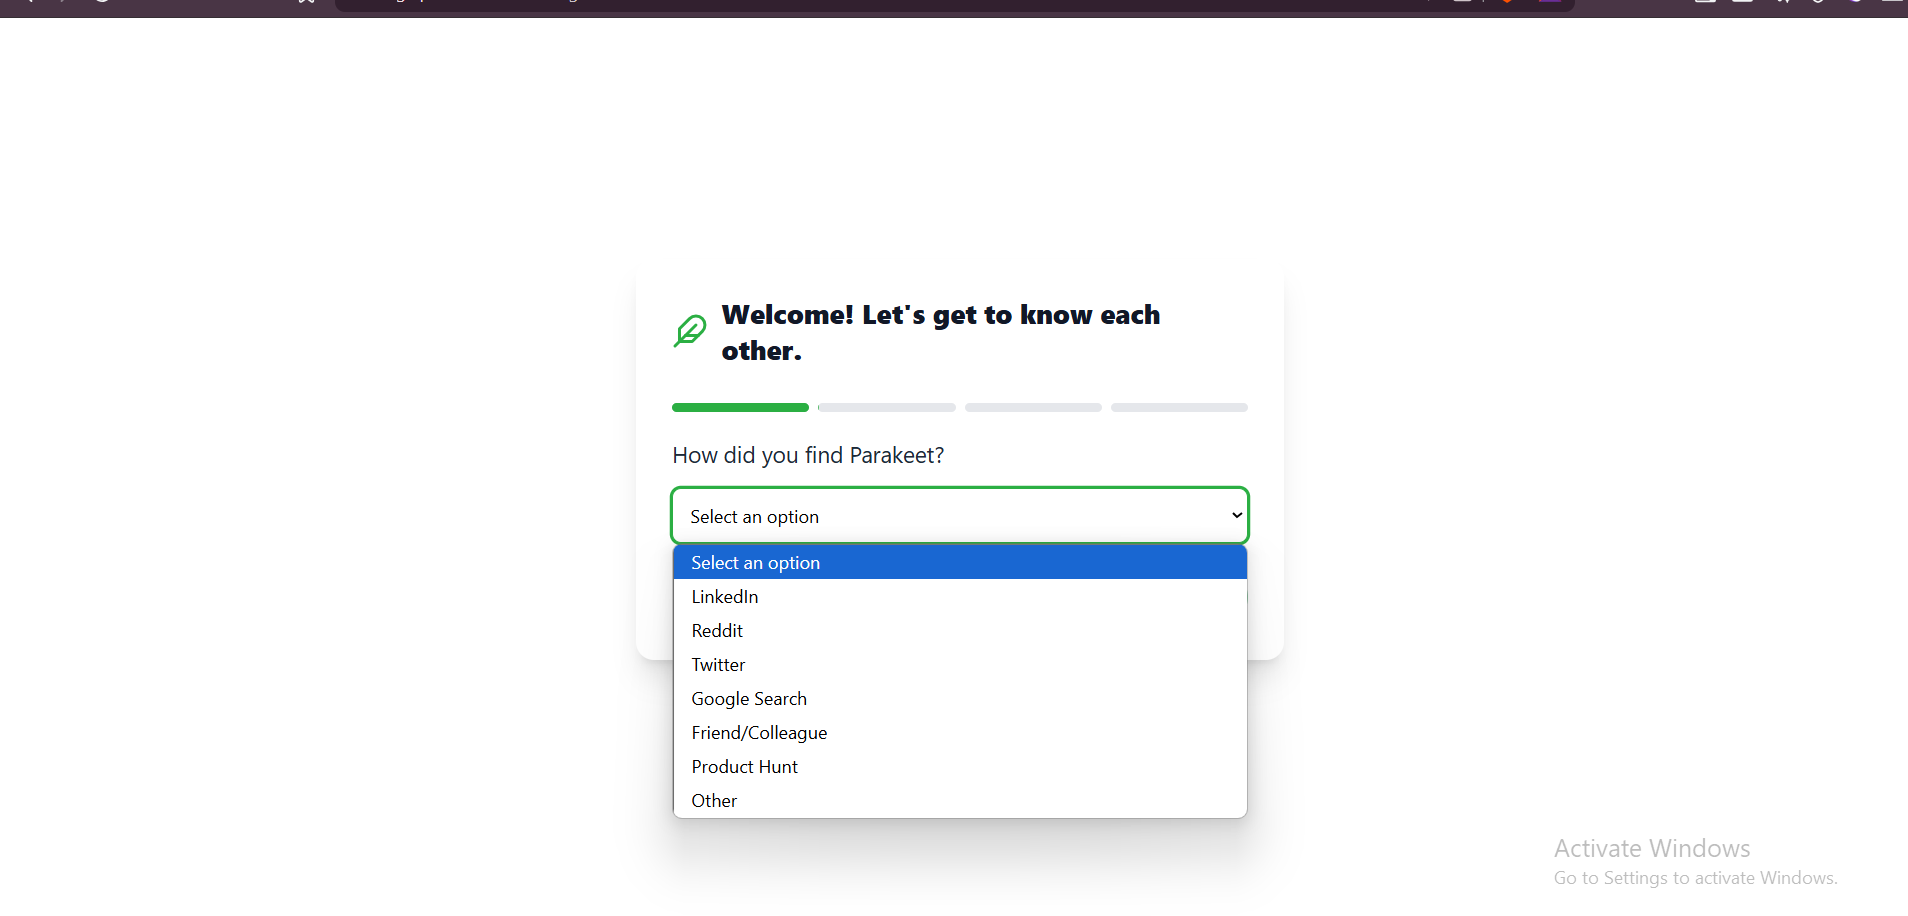
Step 1: Welcome Survey
Purpose: To collect user context and personalize the experience.
Questions include:
-
Q1: How did you find Parakeet?
Options:-
LinkedIn
-
Reddit
-
Twitter
-
Google Search
-
Friend/Colleague
-
Product Hunt
-
Other (Manual Entry)


-
-
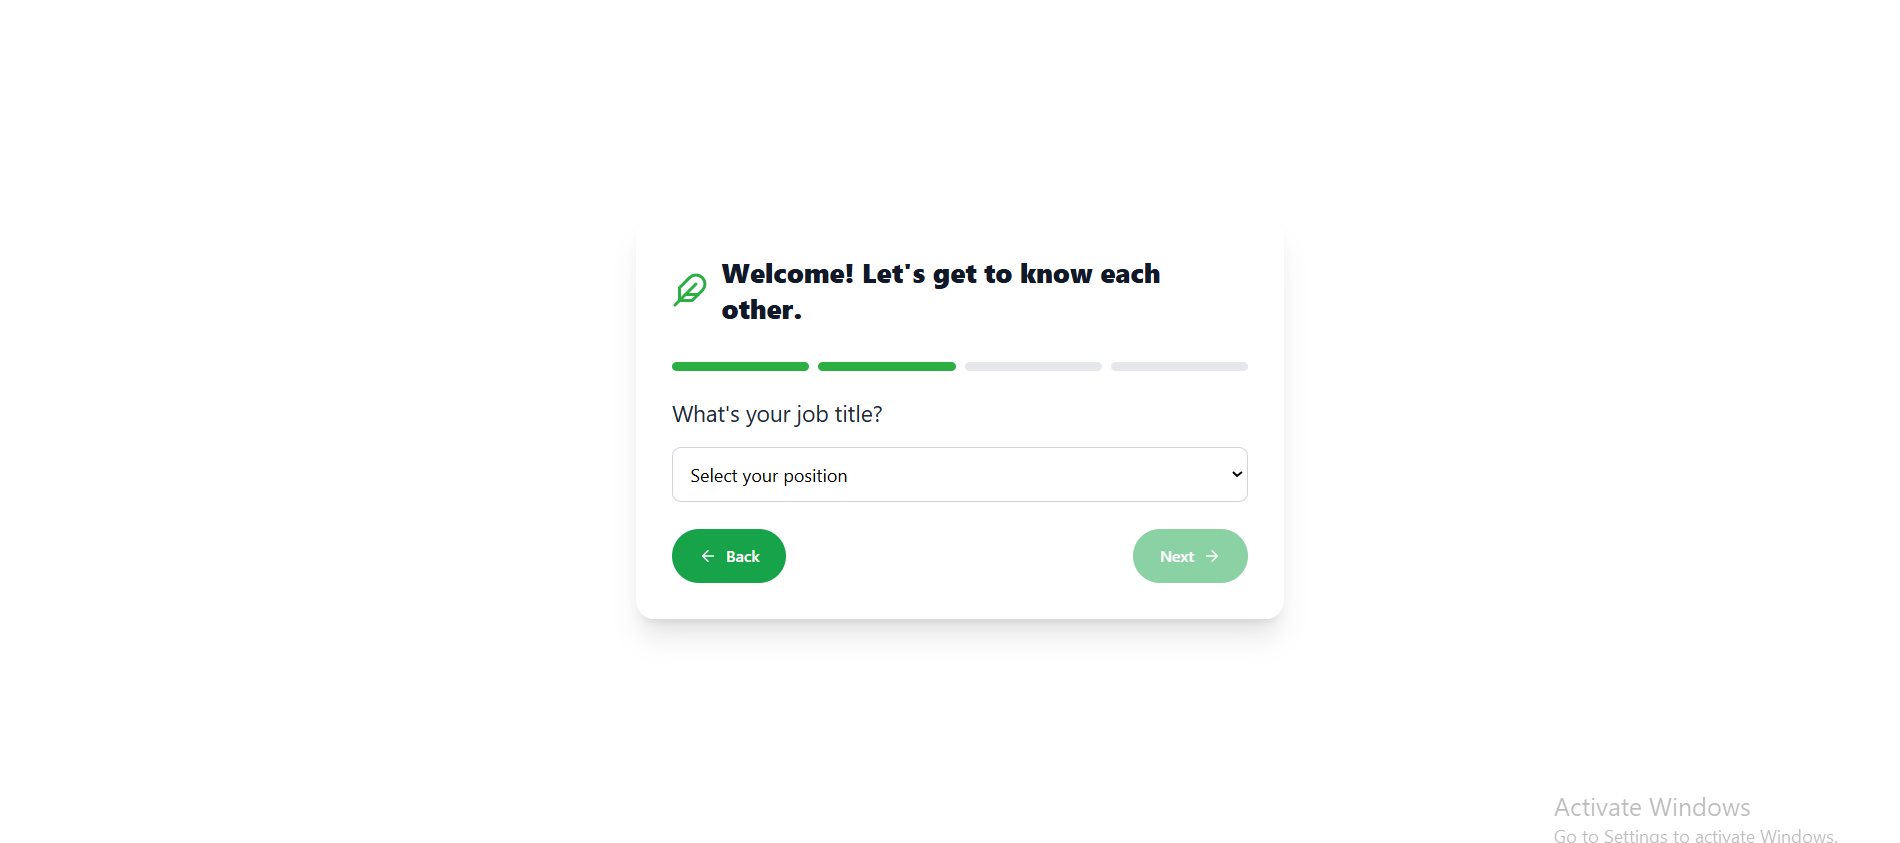
Q2: What is your job title?
Options:-
CEO
-
Founder
-
VP of Sales
-
VP of Marketing
-
Marketing Director
-
Sales Manager
-
Marketing Manager
-
Growth Marketing Manager
-
Demand Generation Manager
-
Account Executive (AE)
-
Sales Development Representative (SDR)
-
Business Development Representative (BDR)
-
Other (Manual Entry)


-
-
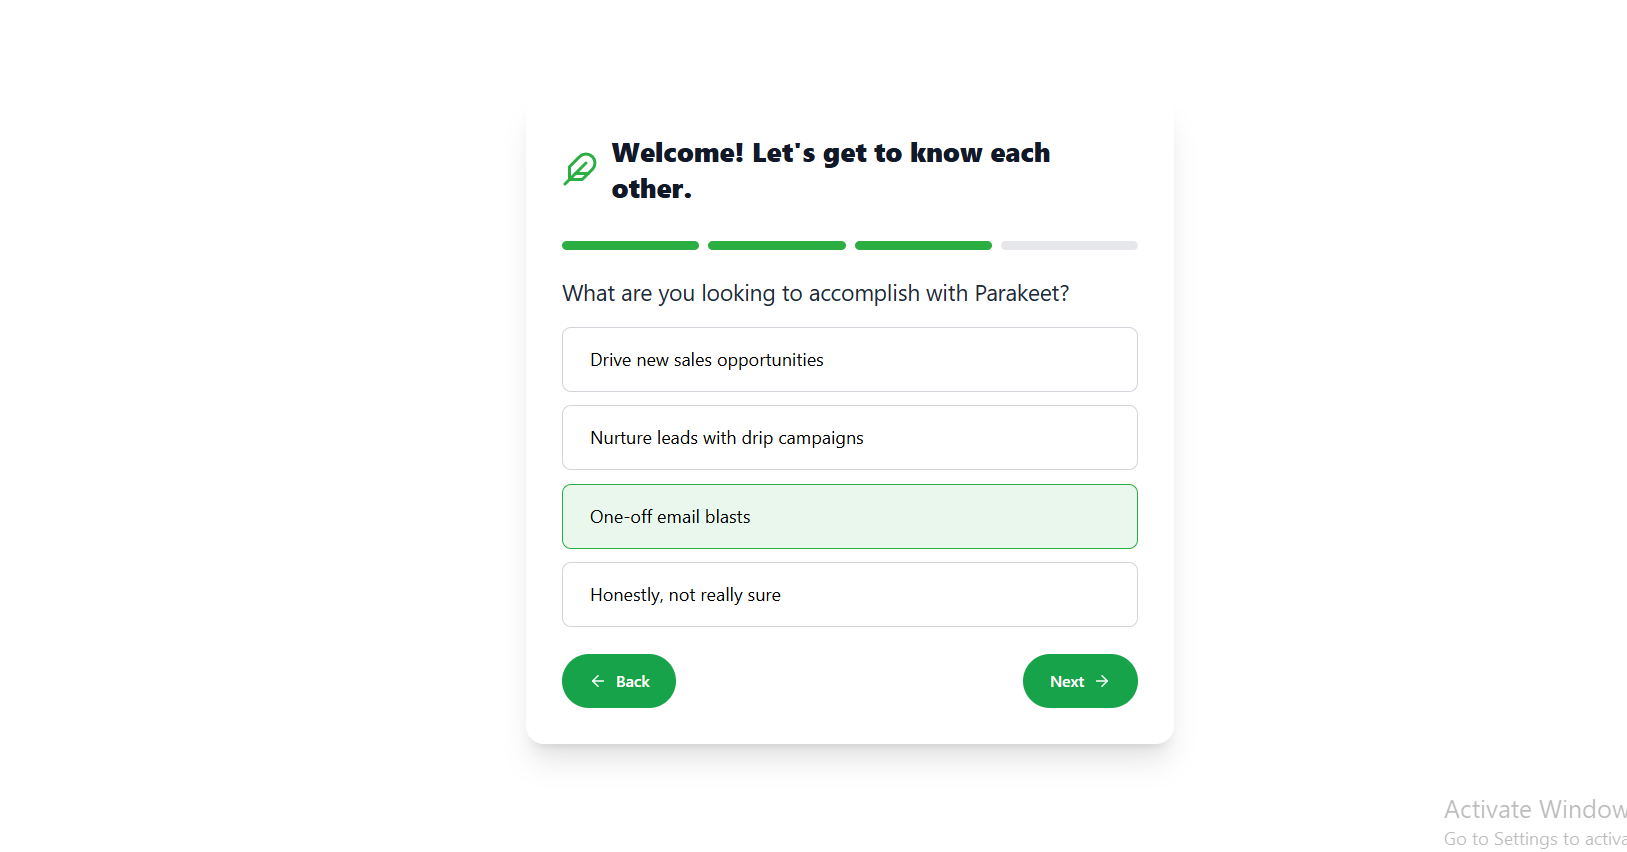
Q3: What are you looking to accomplish?
Options:-
Drive new sales opportunities
-
Nurture leads with drip campaigns
-
One-off email blasts
-
Not sure yet

-

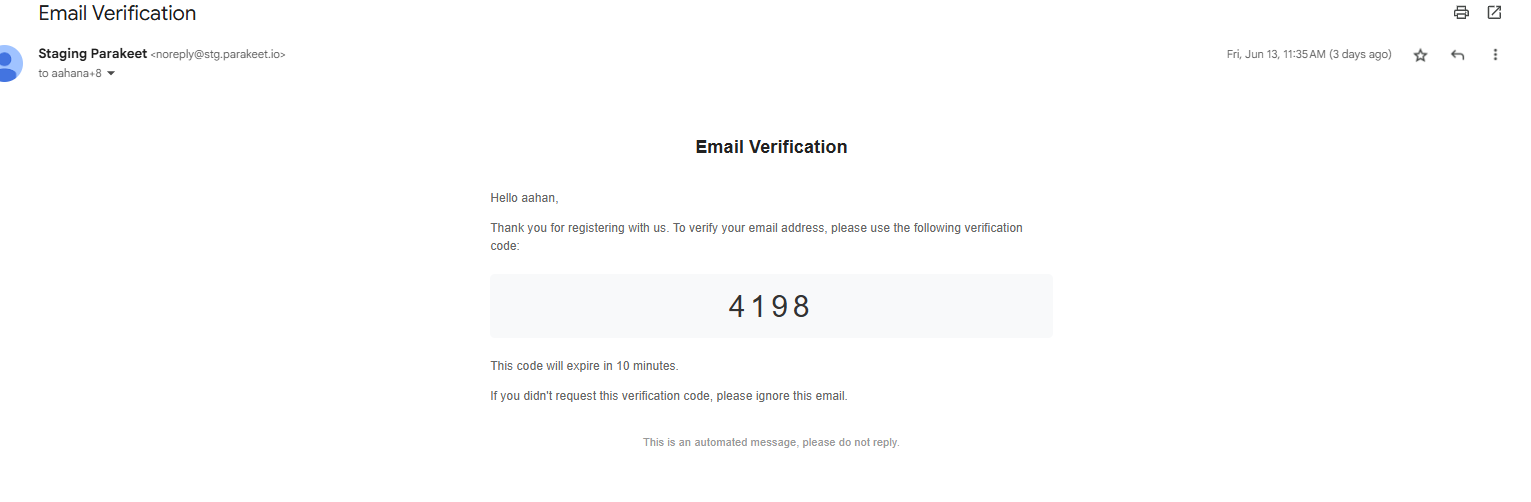
Step 2: OTP Verification
-
An OTP is sent to the email provided.
-
If OTP is correct → proceed to next step
-
If OTP is incorrect → option to retry or resend OTP
- Additionally the users are given an option to regenerate the OTP after 30 seconds

- Email is sent out in the following format


Step 3: Campaign Builder Prompt
User is greeted with a message encouraging them to start building their first campaign:
"Building a campaign from scratch can be tough. This should make it easy for you. Ready?"
Options:
-
"Let’s Go" → Launches the AI-powered campaign generation flow
-
"I’ll do it myself" → Redirects to dashboard/homepage


AI Campaign Onboarding Flow

Purpose
This flow guides a new user through a 5-step AI-powered onboarding sequence to set up their first campaign using automated inputs.
Overview of Steps
| Step | Action | Purpose |
|---|---|---|
| 1 | Input Website URL | Extract business details automatically |
| 2 | Fill ICP (Ideal Customer Profile) Form | Confirm/adjust scraped company data |
| 3 | Review AI Website Summary & Campaign | See AI-generated campaign draft and variables |
| 4 | Connect Email Accounts | Either generate accounts or connect existing ones |
| 5 | Import Leads | Upload a CSV of leads or request free leads for campaign execution |
Step-by-Step Flow
Step 1: Enter Website URL
-
The user inputs their website (e.g.,
example.com). -
This domain is used to scrape relevant business and ICP details.
Screenshot Placeholder
Step 2: ICP Form (Auto-Filled)
-
Displayed after scraping the domain data
-
User can review or edit the fields:
-
Industry
-
Target Audience
-
Company Size (⚠️ Currently allows multiple selections — should be single-select)
-
Screenshot Placeholder

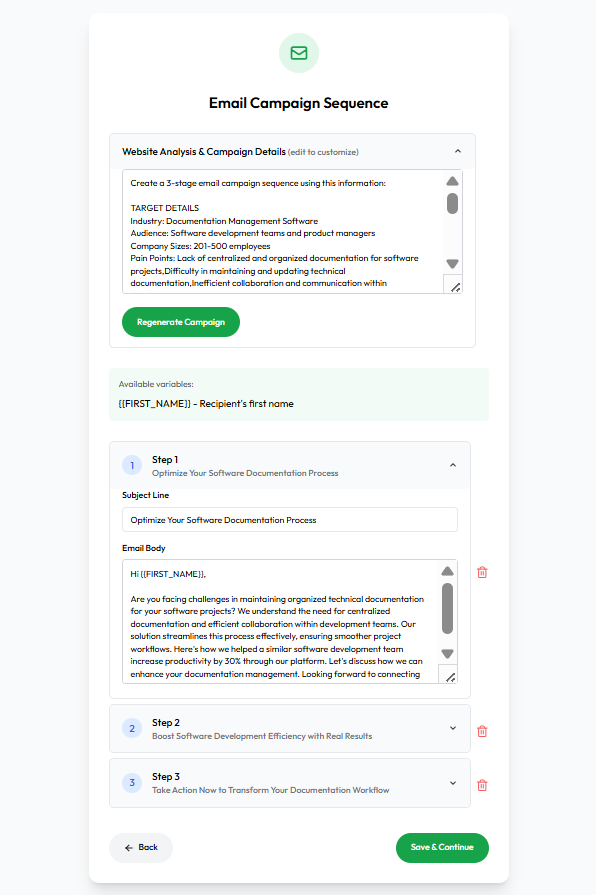
Step 3: AI Website Summary & Email Campaign
-
Displays:
-
Website summary (based on scraping)
-
A 3-step cold email sequence with subject lines and editable body
-
Available merge variables like
{FIRST_NAME},{COMPANY_NAME}, etc
-
Screenshot Placeholder
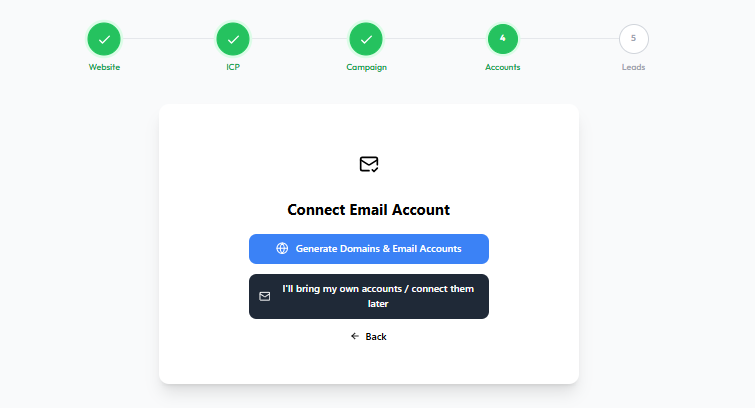
Step 4: Connect Email Account
-
User is prompted to either:
-
Generate Domains & Email Accounts (redirects to domain purchase flow)
-
Connect Existing Accounts (OAuth or manual configuration)
-
Screenshot Placeholder
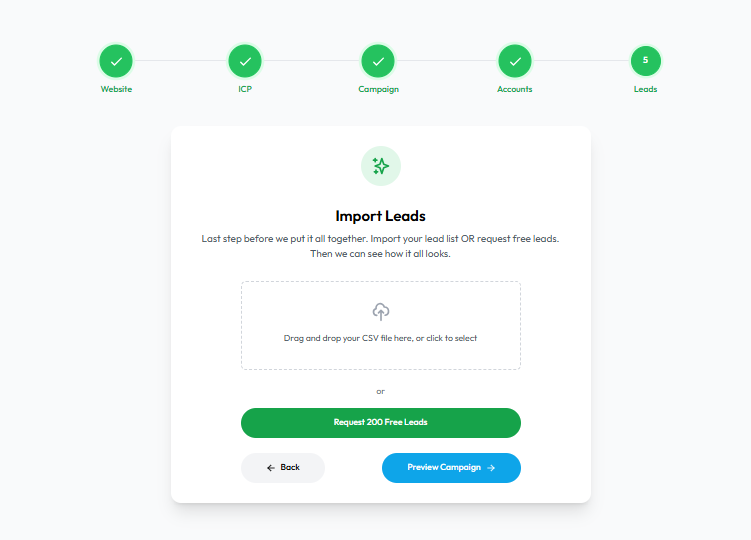
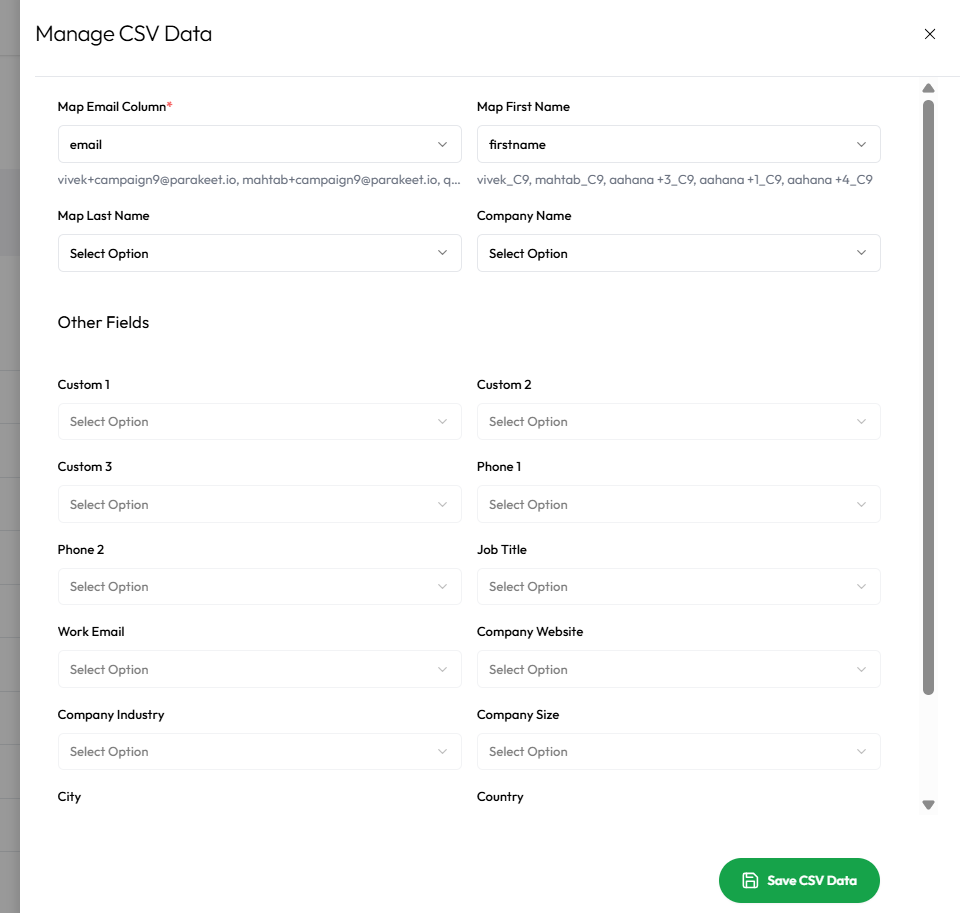
Step 5: Import Leads
-
Options available:
-
Upload lead list via CSV
-
Request 200 free leads
-
-
This step concludes the flow and redirects the user to the dashboard.
Screenshot Placeholder
Email Validator

Flow Overview
This document outlines the complete user journey for interacting with the Email Validator feature in the Parakeet app, including:
-
Bulk email upload
-
Email validation
-
Viewing categorized results
-
Exporting results
Navigation Path
-
Login and Dashboard Access
-
User logs in and lands on a minimal dashboard.
-
Dashboard acts as a navigation hub.
[Insert Screenshot Here: Dashboard with Email Validator in left nav]
-
-
Open Email Validator
-
User clicks "Email Validator" in the left-hand menu.
-
Redirects to:
https://app.parakeet.io/email-validator

-
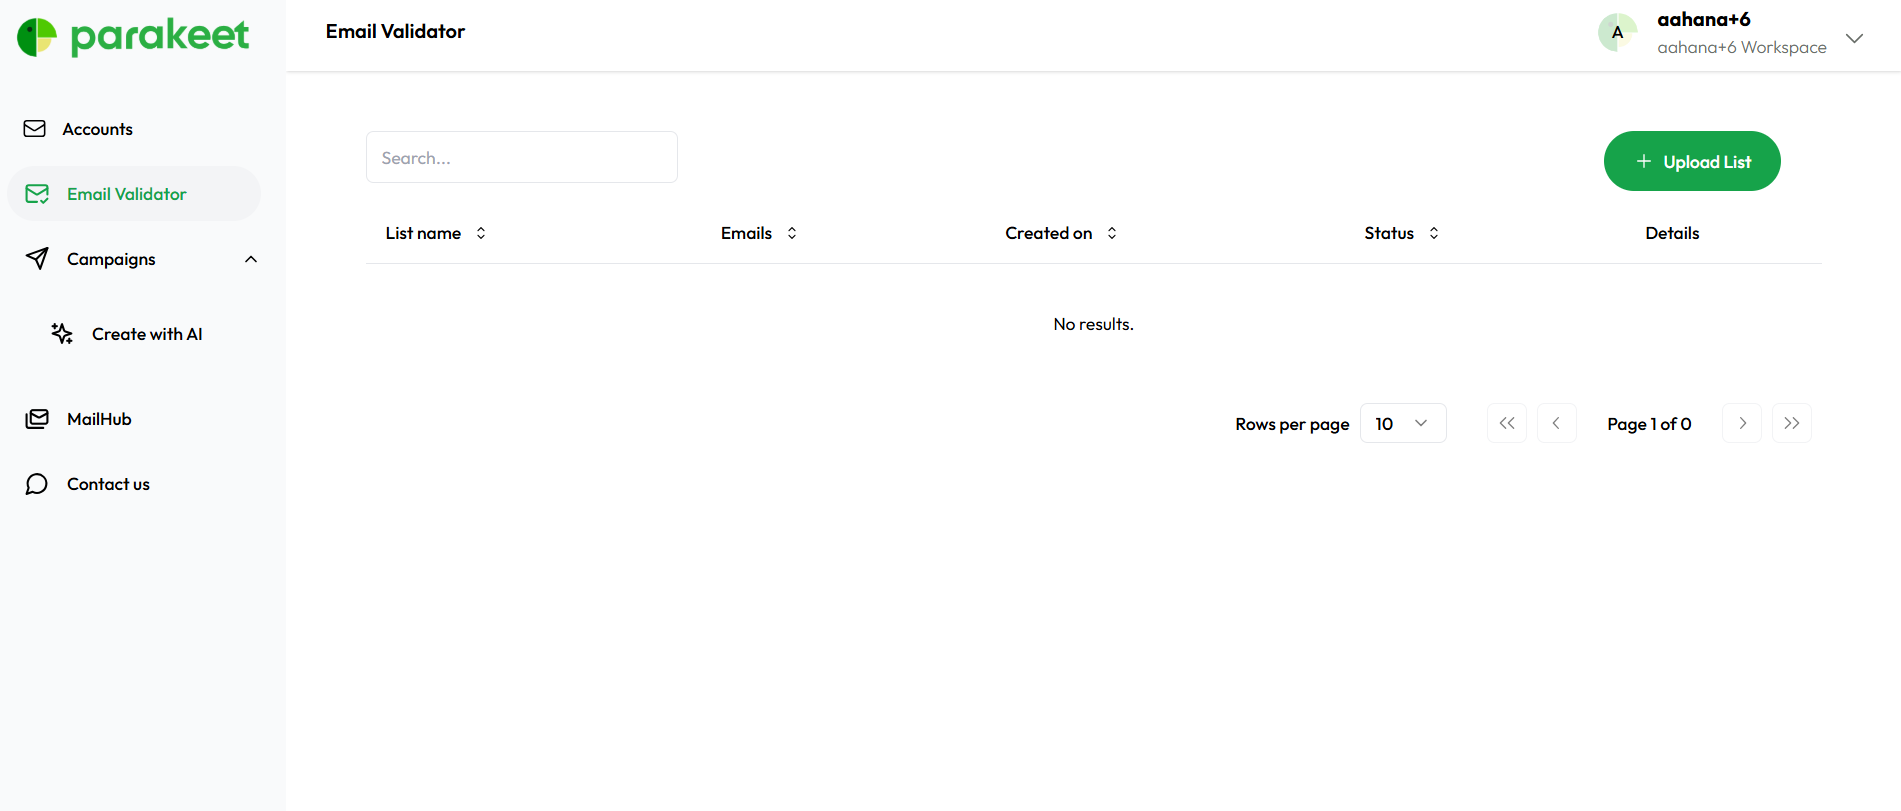
Email Validation – Two Modes
On the Email Validator page, users see two options:
-
Search
-
For single email validation.
- multiple Emails can be added but one in each line
-
-
Upload List (Primary Use Case)
-
For bulk validation via .csv upload or manual entry.
-
Upload List Flow
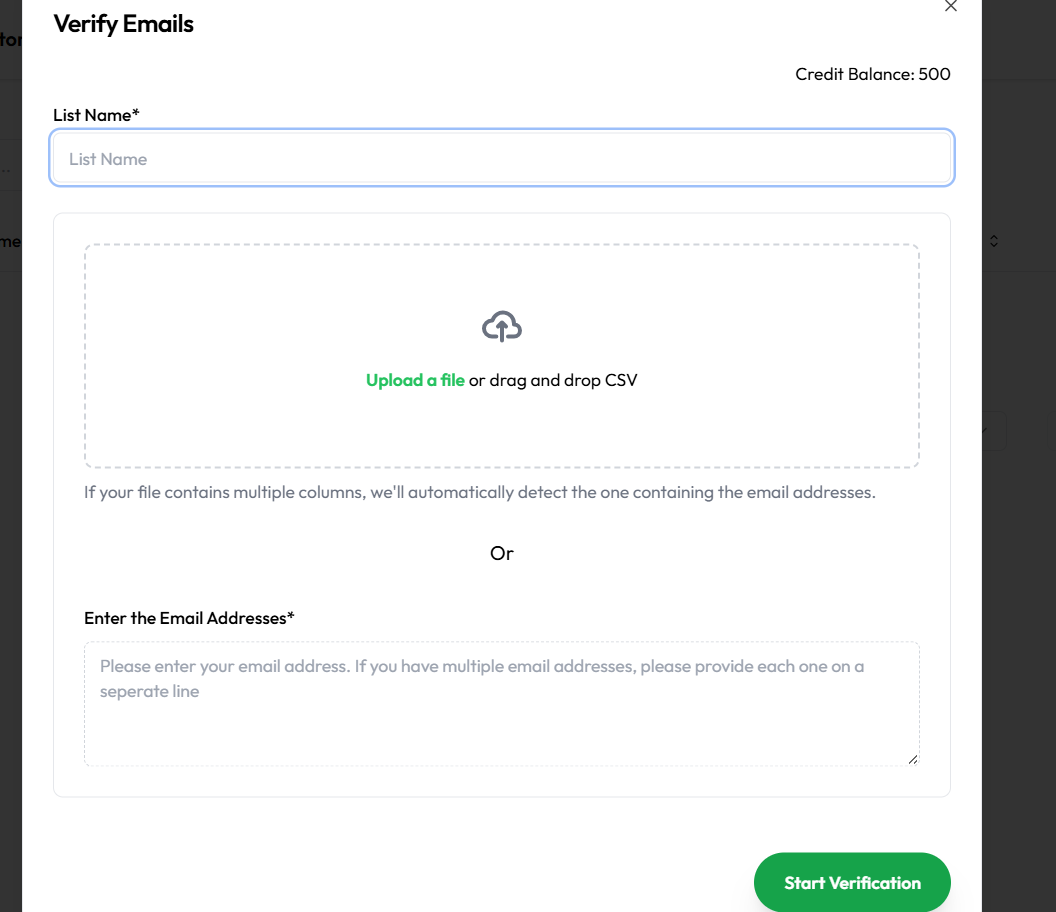
1. Input Requirements
-
User must enter a List Name (required field).
-
User can choose either:
-
Upload a
.csvfile with emails -
Manually paste emails into a textbox
-
2. Trade Balance Check
-
System checks available credits before submission (if credit system is enabled).
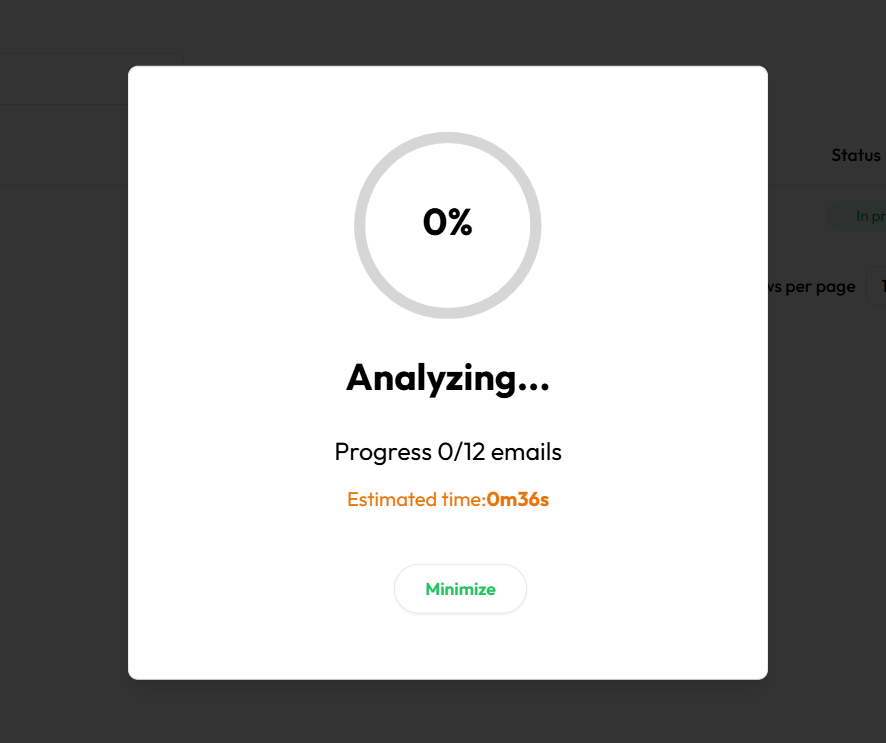
3. Analyzing Stage
-
After clicking submit, a popup displays progress:

Results and Email Status
1. Viewing Results
-
User clicks "View Results" after analysis completes.
-
The page refreshes with categorized results.

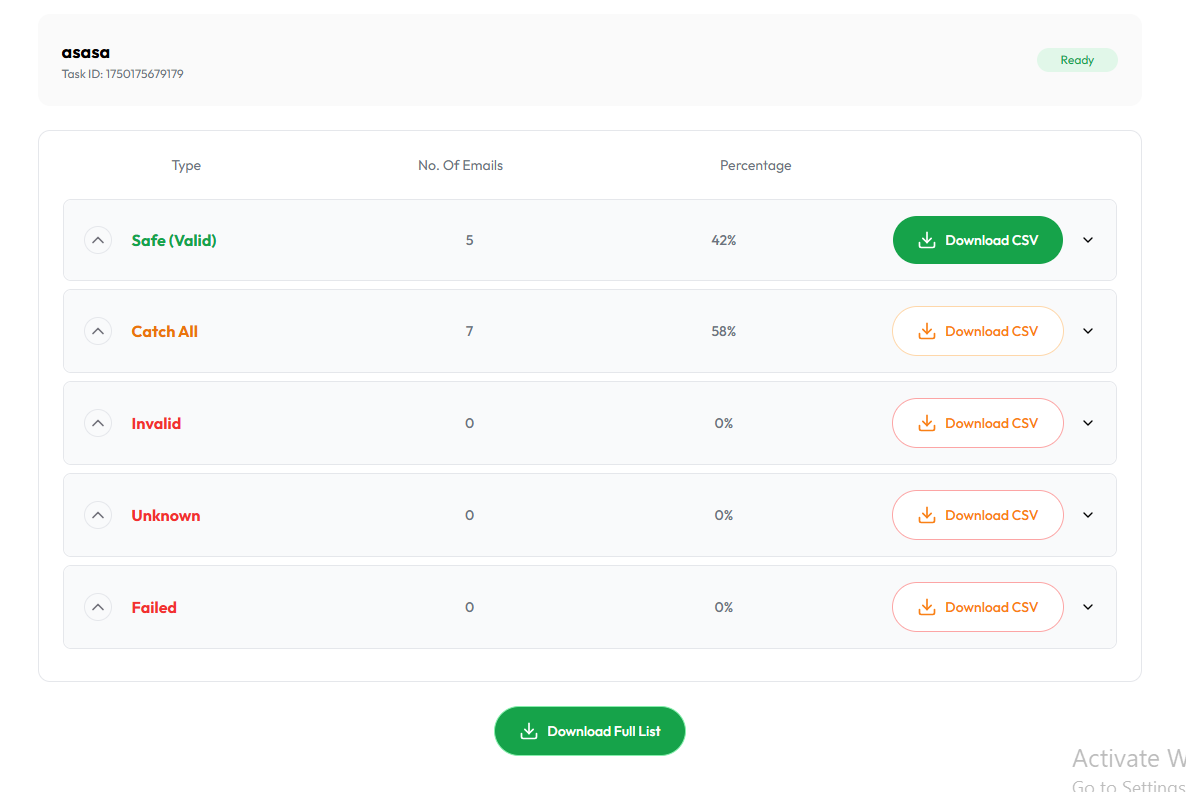
2. Status Categories
Results are grouped into dropdowns:
-
✅ Safe – Valid and safe
-
⚠️ Catch All – Domain accepts all, unsure validity
-
❌ Invalid – Email is invalid
-
❓ Unknown – Could not verify
-
🚫 Failed – Technical failure
CSV Downloads
Users can export data via:
-
Single CSV – All results combined
-
Filtered CSV – Individual groups (e.g., only "Catch All")
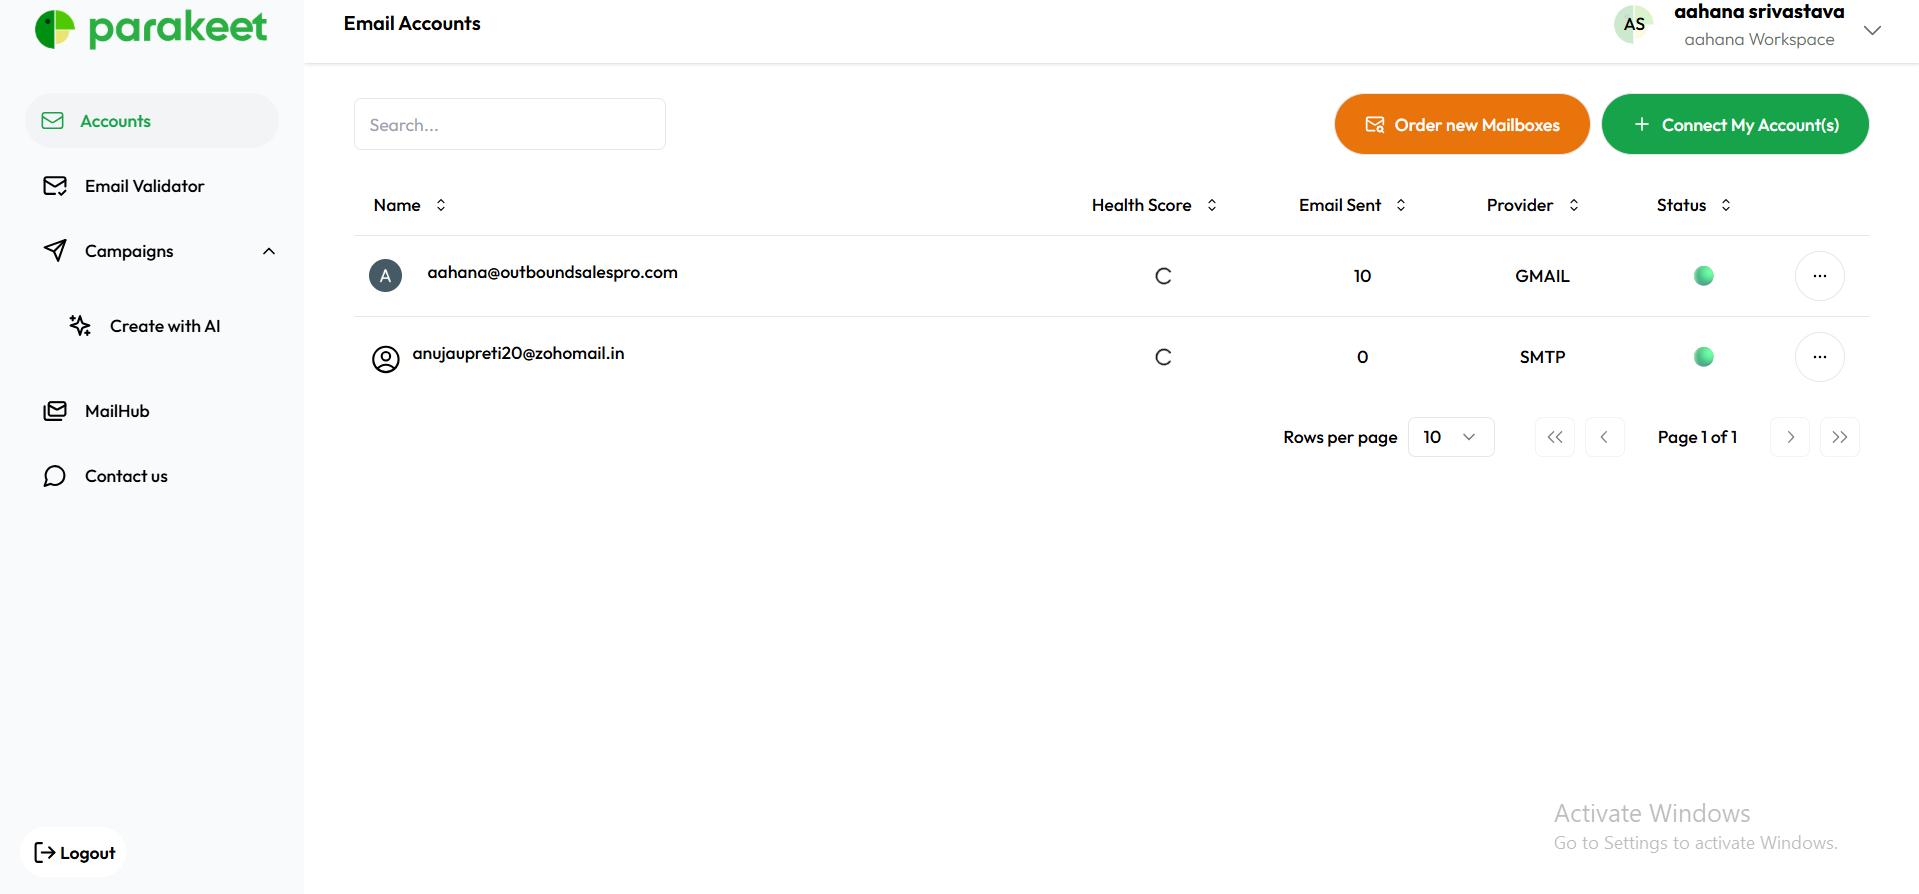
Accounts page

Purpose
This flow allows users to connect or purchase sending email accounts for use in cold outreach. It supports Gmail, Outlook, and custom IMAP/SMTP providers. Once connected, all accounts appear in a centralized list with metadata and action options.
1. Navigation Entry Point
-
User logs in and clicks on the "Accounts" tab from the sidebar.
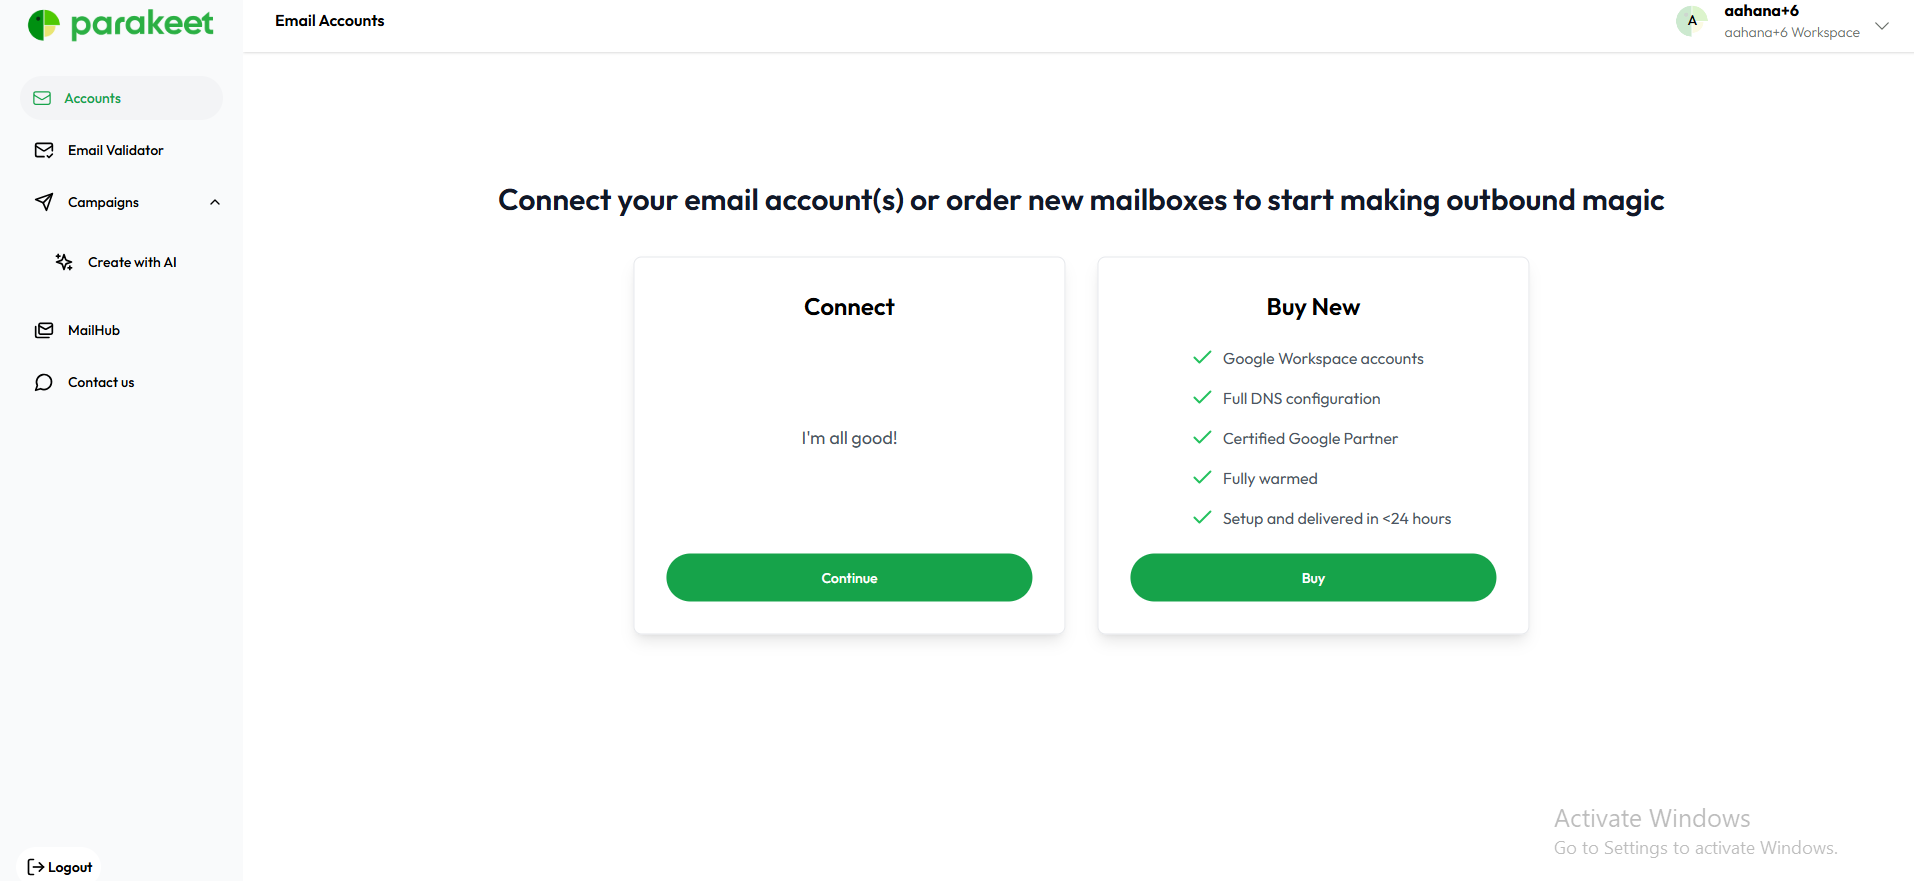
2. Email Connection Options
Upon accessing the page, users see options to add a new email account using one of three methods:
Option 1: Connect Existing Email
User clicks "Connect Email", then selects one of the following providers:
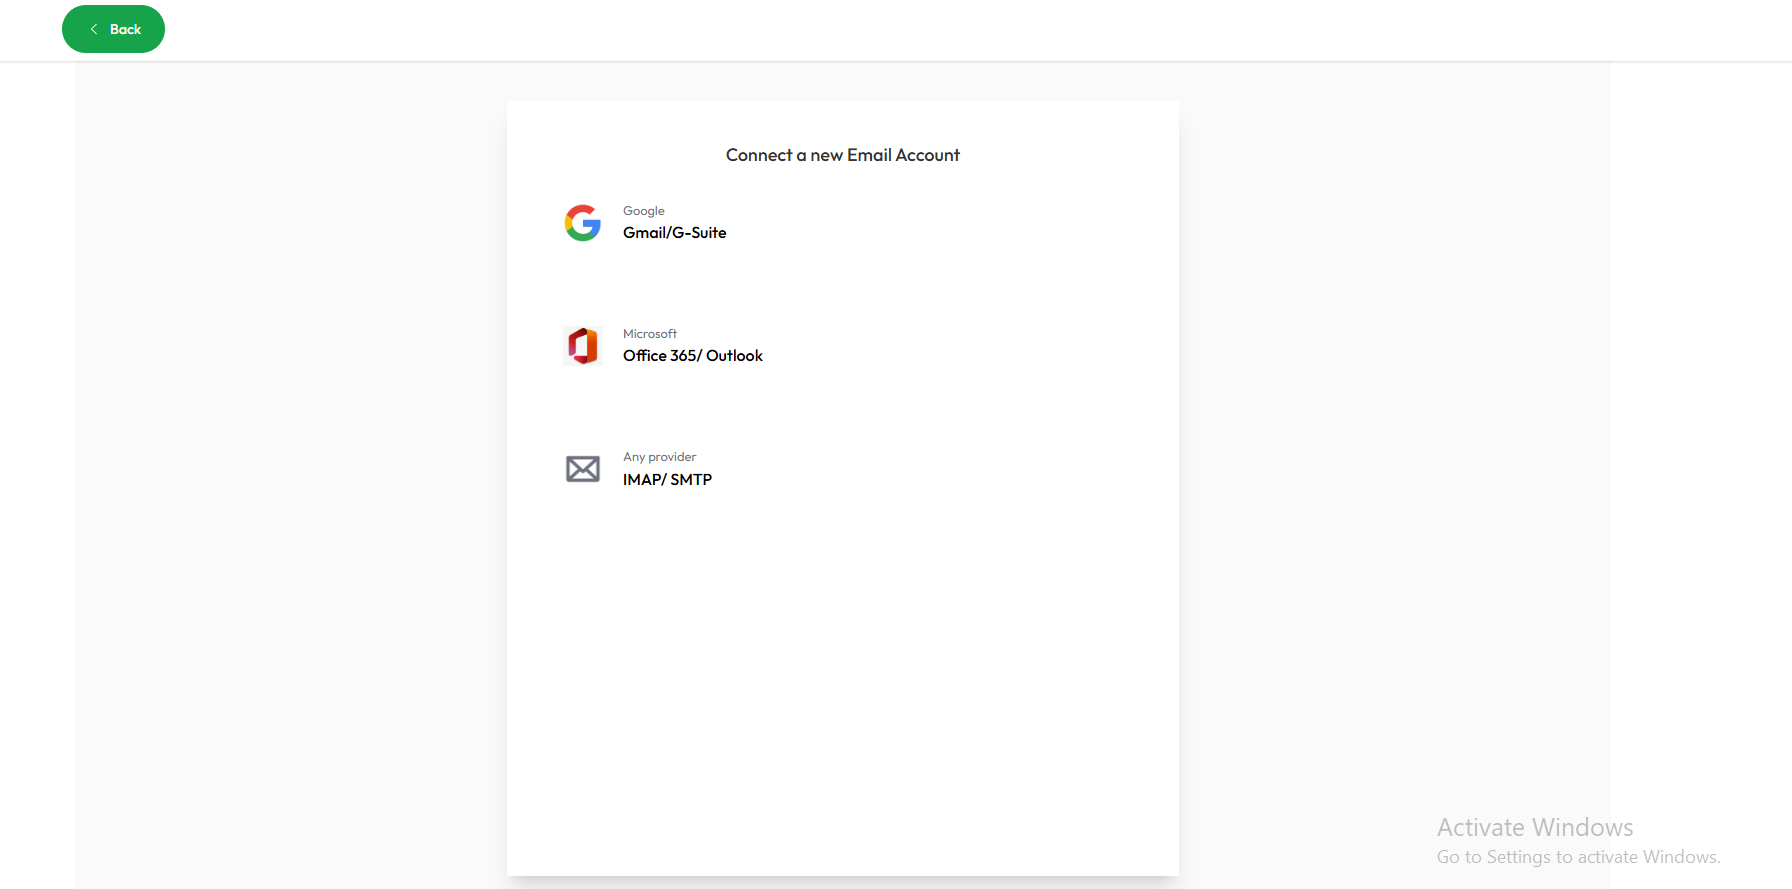
➤ Google (Gmail)
-
Opens a Google OAuth pop-up:
“Connect your Gmail account” -
User signs in via Google login.
-
Permissions are granted through the standard Google OAuth flow.

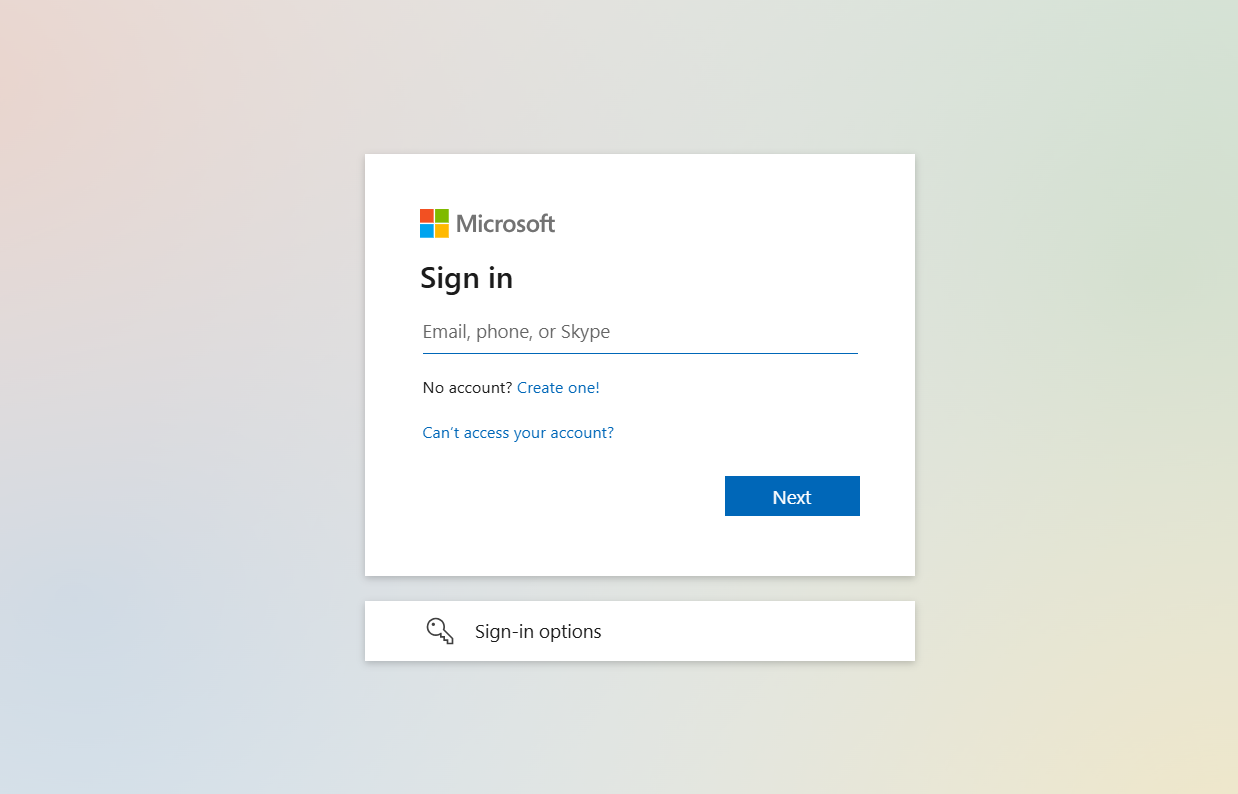
➤ Outlook (Microsoft 365)
-
Redirects user to
https://login.microsoftonline.com -
User logs in with Microsoft credentials.
-
OAuth-based access approval is completed.
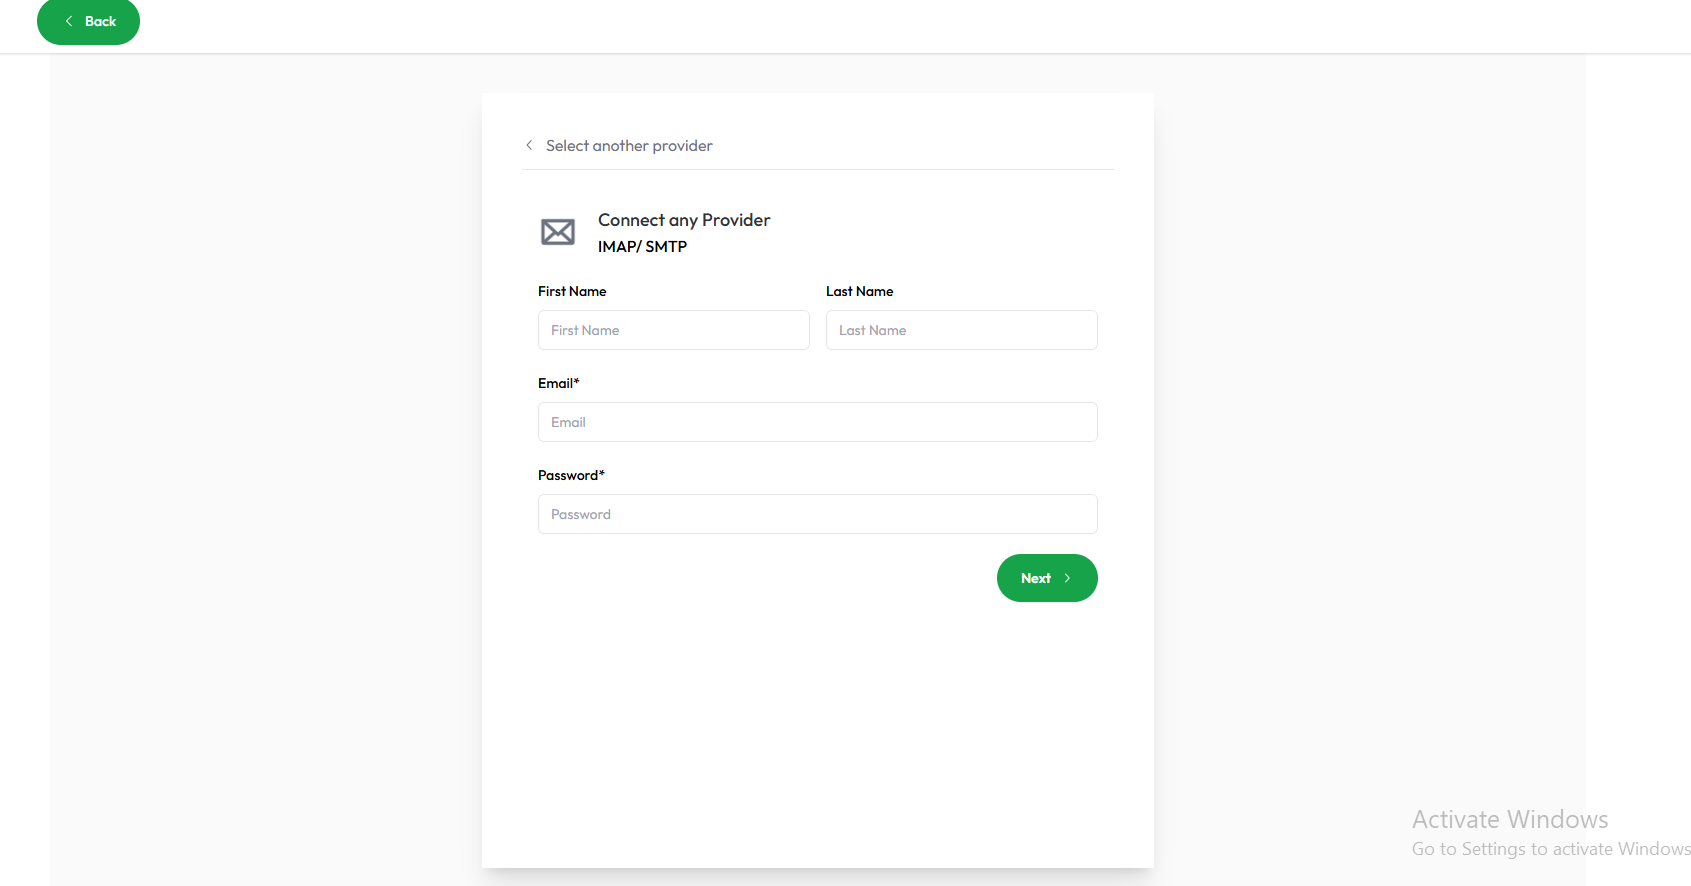
➤ Custom Provider (IMAP + SMTP)
User is prompted to manually enter the following:
-
Email address
-
Provider name
-
Incoming mail (IMAP) server
-
Outgoing mail (SMTP) server
-
Ports and encryption type (SSL/TLS)
-
Credentials (Username and Password, if applicable)
Option 2: Buy New Email
Users may choose to purchase a new mailbox from within the platform. This typically includes:
-
Automated domain setup
-
SMTP configuration handled internally
[insert the link to buy doimans flow]
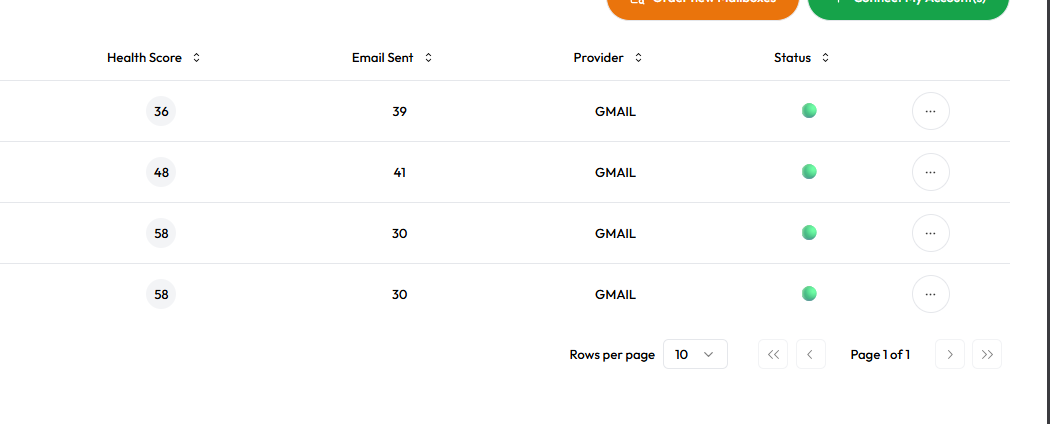
3. Post-Connection: Email Appears in List
After successful connection or purchase, the new email is added to the Accounts list.
Each row in the list displays:
-
Email Address
-
Provider
-
Health Score
-
Total Emails Sent
-
Status (Connected / Not Connected)
-
Action Menu (3 Dots)

4. Health and Status Indicators
Each connected email shows:
-
Health Score (numerical or colored scale)
-
Status: e.g., "Connected", "Disconnected", or "Reconnect Required"
-
Provider: Google, Outlook, or Custom
-
Emails Sent: Total number of emails sent using that address
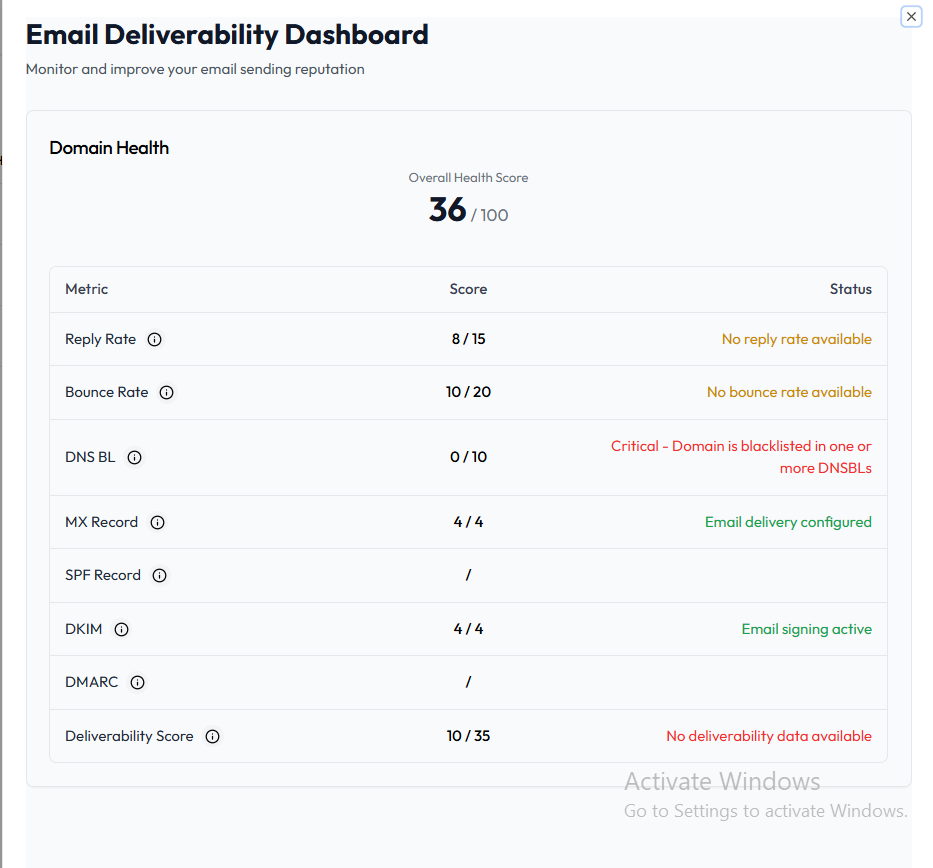
Email Health Score & Deliverability Dashboard
Once an email is connected, it’s displayed in the Accounts tab with additional metrics, including:
-
Email Address
-
Provider
-
Health Score (0–100)
-
Total Emails Sent
-
Status (Connected / Needs Reconnect)
-
3-dot menu (actions)
Clicking on the Health Score opens the Email Deliverability Dashboard, which evaluates the domain’s ability to successfully deliver emails based on the following metrics:
| Metric | Score Weight | Status Description |
|---|---|---|
| Reply Rate | 15 pts | % of recipients replying |
| Bounce Rate | 20 pts | % of emails that bounced |
| DNS BL | 10 pts | Whether domain is blacklisted |
| MX Record | 4 pts | Mail exchange record status |
| SPF Record | – | Authenticates sender IP |
| DKIM | 4 pts | Email signing active |
| DMARC | – | Alignment & policy check |
| Deliverability Score | 35 pts | Combined score summary |
Each row is color-coded:
-
✅ Green: Active/Valid
-
⚠️ Yellow: Missing or incomplete
-
❌ Red: Critical (e.g., blacklisted)\
5. Actions Menu (⋮)
Clicking the three-dot menu on each email opens four options:
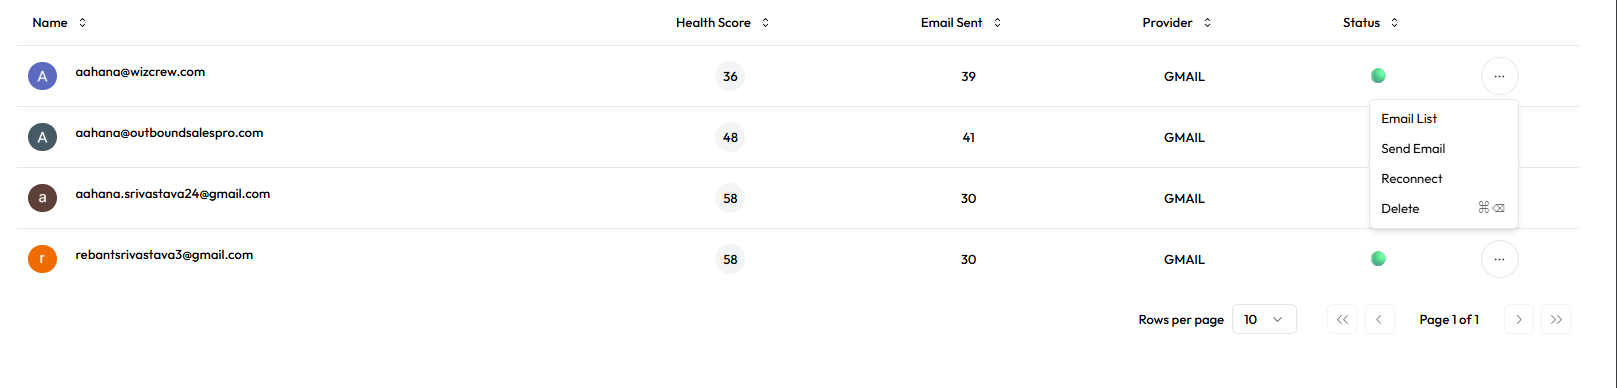
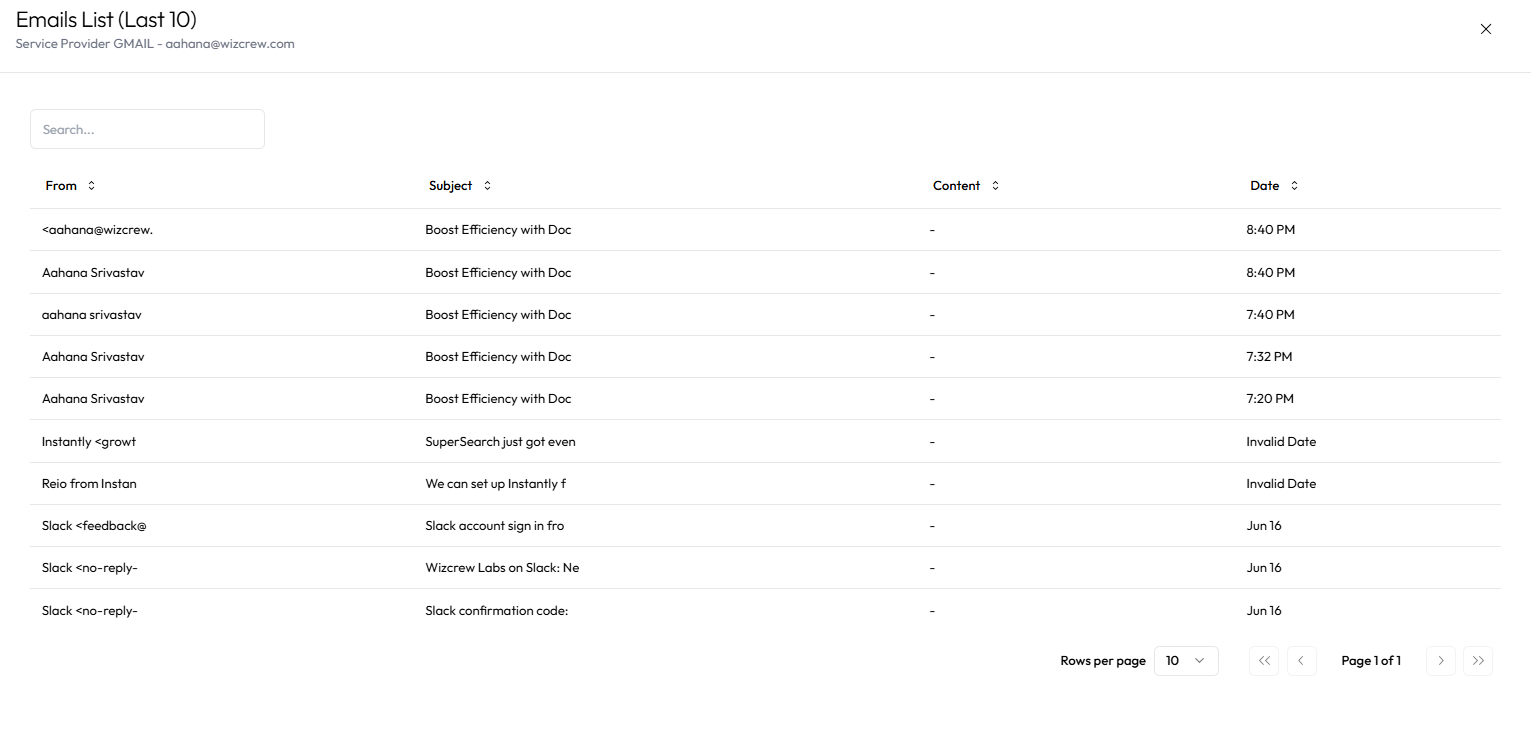
-
Email List – View campaigns or mail associated with the account

-
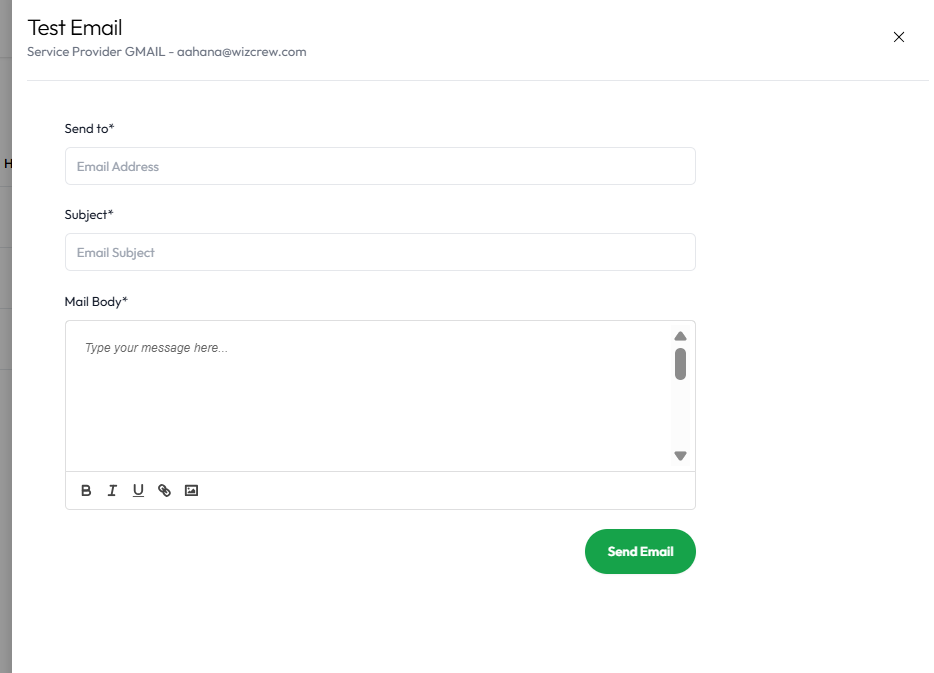
Send Email – Opens sidebar form with:
-
To
-
Subject
-
Email Body

-
-
Reconnect – Re-runs the provider connection flow
-
Delete – Permanently removes the email from your account
Purchase flow
Purchase flows (For Domain and Emails)

urpose
This flow outlines how users can buy email mailboxes through two different paths in the Parakeet app—either via the AI Onboarding Flow or the Buy Mailbox Tab from the sidebar. Based on the number of mailboxes requested, a relevant Stripe subscription tier is triggered.
🧭 Entry Points
-
AI Onboarding Flow → Generate Domain and Email
-
Appears during onboarding campaign setup.
-
Domain and email counts are pre-filled based on earlier inputs.
-
Default prefill: 2 domains, 2 emails per domain → total 4 emails.
**[Insert Screenshot Here: Prefilled form from AI flow]** -
-
Sidebar → Buy Mailbox Tab
-
Accessed from Accounts tab in sidebar navigation.
-
Domain and email count are blank by default.
-
Users manually input values.
**[Insert Screenshot Here: Empty form in sidebar flow]** -
📥 Input Fields
| Field | Description | Prefilled in AI? | Required |
|---|---|---|---|
| Domain Count | Number of domains to register | Yes | Yes |
| Emails per Domain | Emails to generate per domain | Yes (default: 2) | Yes |
-
Users can modify the default values.
-
Max limits: 50 domains × 50 emails = 2,500 emails max
💳 Subscription Tiers
| Total Email Count | Subscription Requirement |
|---|---|
| 1–2 | No subscription required |
| 3–5 | Growth Plan – $99/month |
| 6+ | Ultra Growth – $199/month |
-
User does not pick a plan manually.
-
Stripe plan is determined based on calculated need.
✅ Purchase Flow Steps
-
User fills or sees pre-filled domain + email count.
-
System calculates total required emails.
-
Based on count, appropriate subscription tier is selected.
-
User clicks Buy Now.
-
Redirected to Stripe Checkout.
-
On payment success, system triggers a Stripe webhook.
-
Based on origin of flow:
-
From AI onboarding → User returns to Add Leads step.
-
From Buy Mailbox tab → Redirected to Accounts Tab.
-
🔧 Stripe Processing Logic (Auto-Routed)
-
If 3 ≤ total emails ≤ 5 → routed to Growth ($99/month).
-
If total emails > 5 → routed to Ultra Growth ($199/month).
Campaign
Campaign Module ( inside a campaign)
Campaign Module – Full Detail View
Entry: Campaigns Tab → Click on Any Campaign
When a user clicks on an existing campaign, the system routes them based on the campaign type:
| Campaign Type | Redirects To |
|---|---|
| AI Campaign | Campaign Tab |
| Manual Campaign |
Leads Tab |
Once inside a campaign, users are presented with a structured interface that includes several functional tabs. These tabs form the control center for managing the lifecycle of a cold email campaign from creation to tracking outcomes.
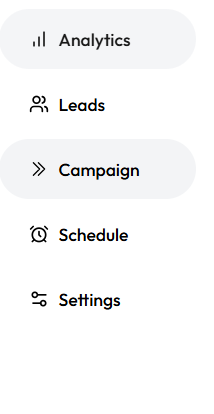
Campaign Dashboard – Tab Overview
Each campaign consists of the following five core tabs:
| Tab Name | Purpose |
| Analytics | Visualizes campaign performance and response metrics |
| Leads | Interface to upload, manage, and monitor lead recipients |
| Campaign | The main editor for configuring email steps and sequences |
| Schedule | Controls campaign launch timing, time zone, and delivery schedule |
| Settings | Technical and safety configurations like bounce rules, sender logic |
Campaign Tab – Email Sequence Builder
This is the centerpiece for campaign setup. It allows:
-
Adding unlimited steps in the email sequence.
-
Each step has configurable delays (e.g., "Send Step 2 after 3 days").
-
Drafting subject lines and content for each step.
-
Option to personalize with variables (e.g., {{first_name}}, {{company}}).
-
Rich text editor for formatting.
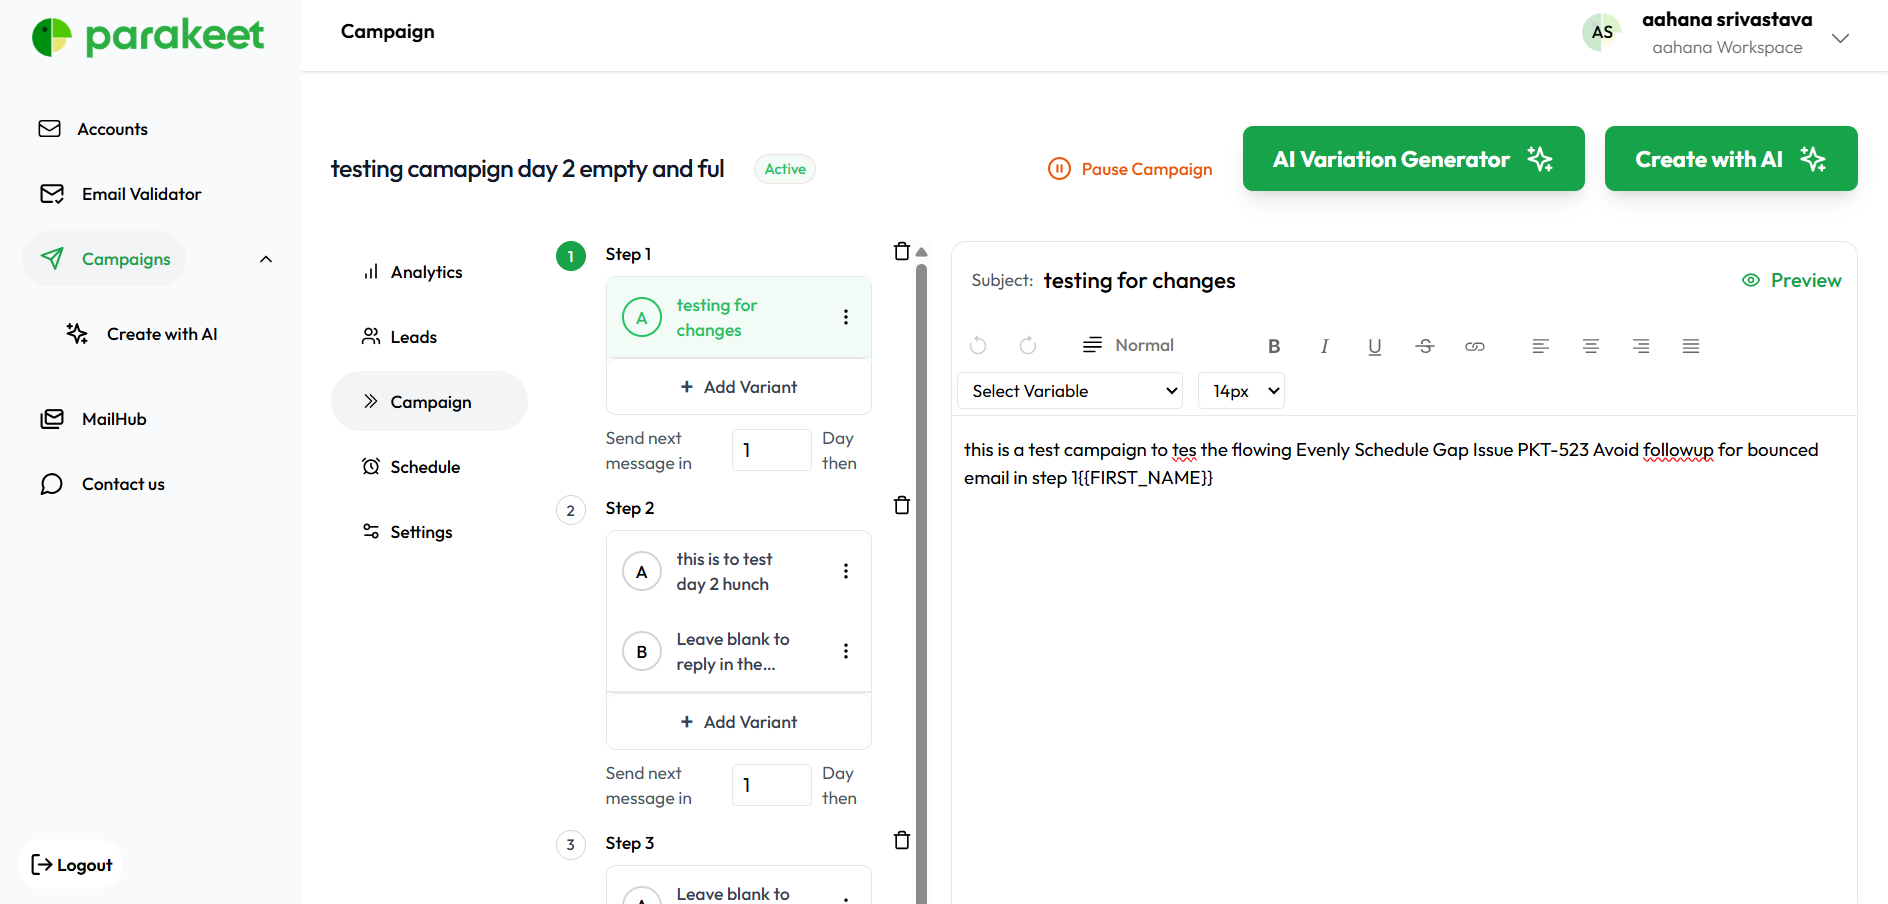
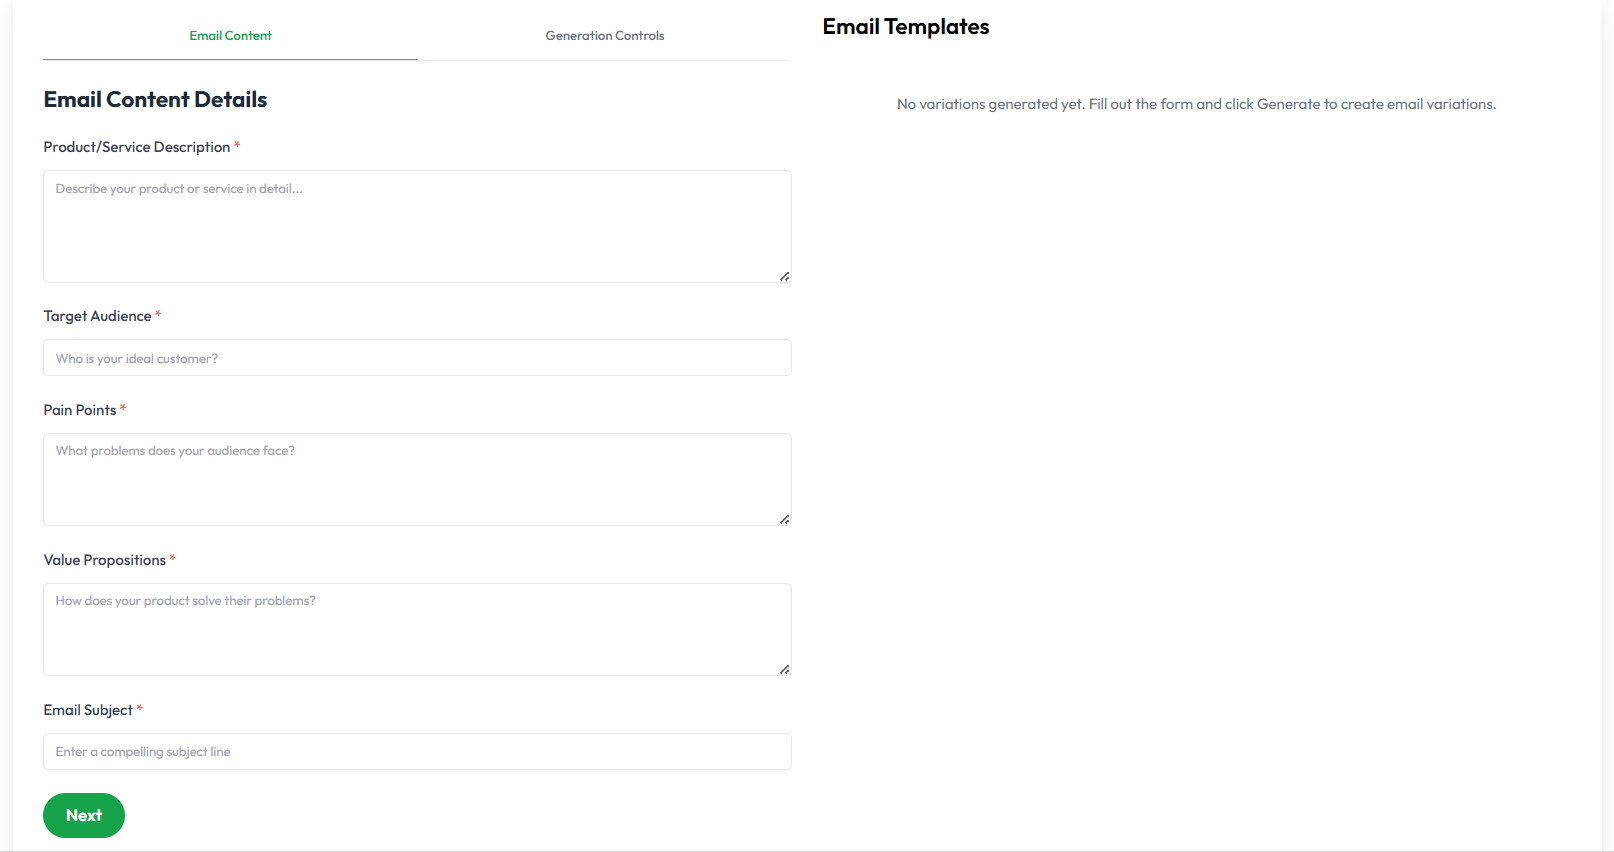
AI Variation Generator
An optional tool available inside the Campaign tab that enhances email copy using AI.
Step 1: Input Requirements
-
Product or service description
-
Target audience details
-
Pain points being addressed
-
Value proposition
-
Email subject line
Step 2: Control Sliders
-
Creativity: Conservative to Creative
-
Urgency: Relaxed to Urgent
-
Tone: Formal to Casual
-
Style: Professional to Conversational
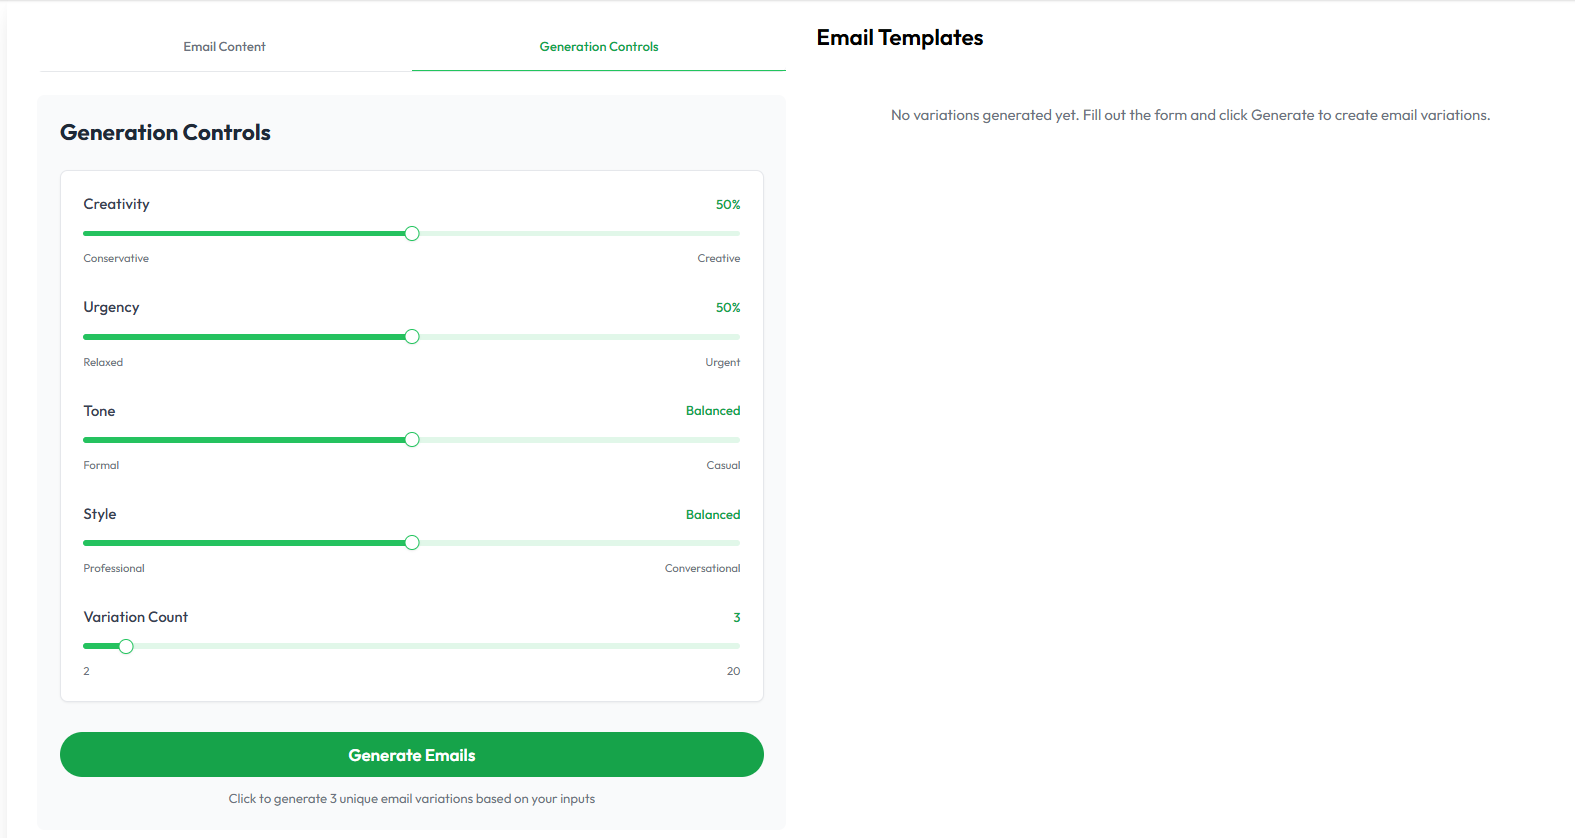
AI will return multiple copy variations that the user can preview, edit, and insert.
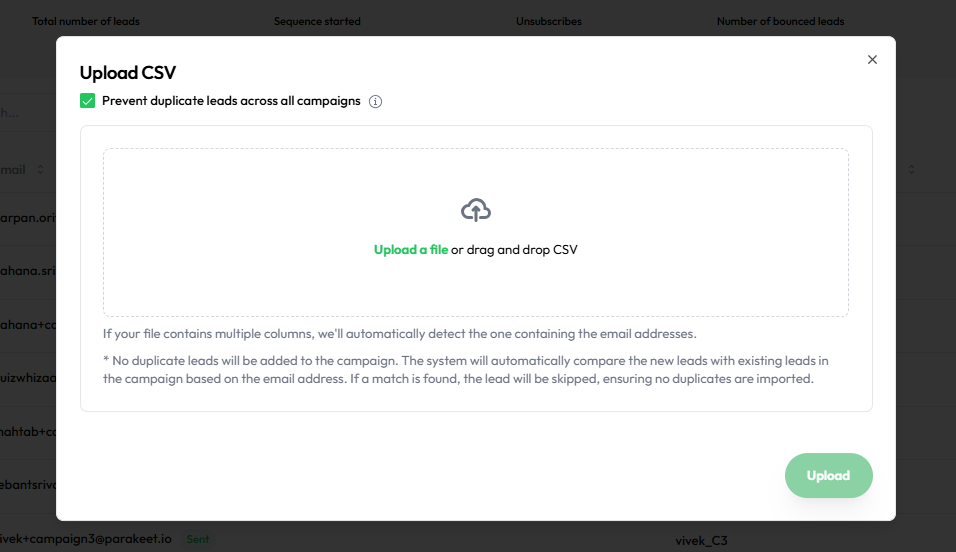
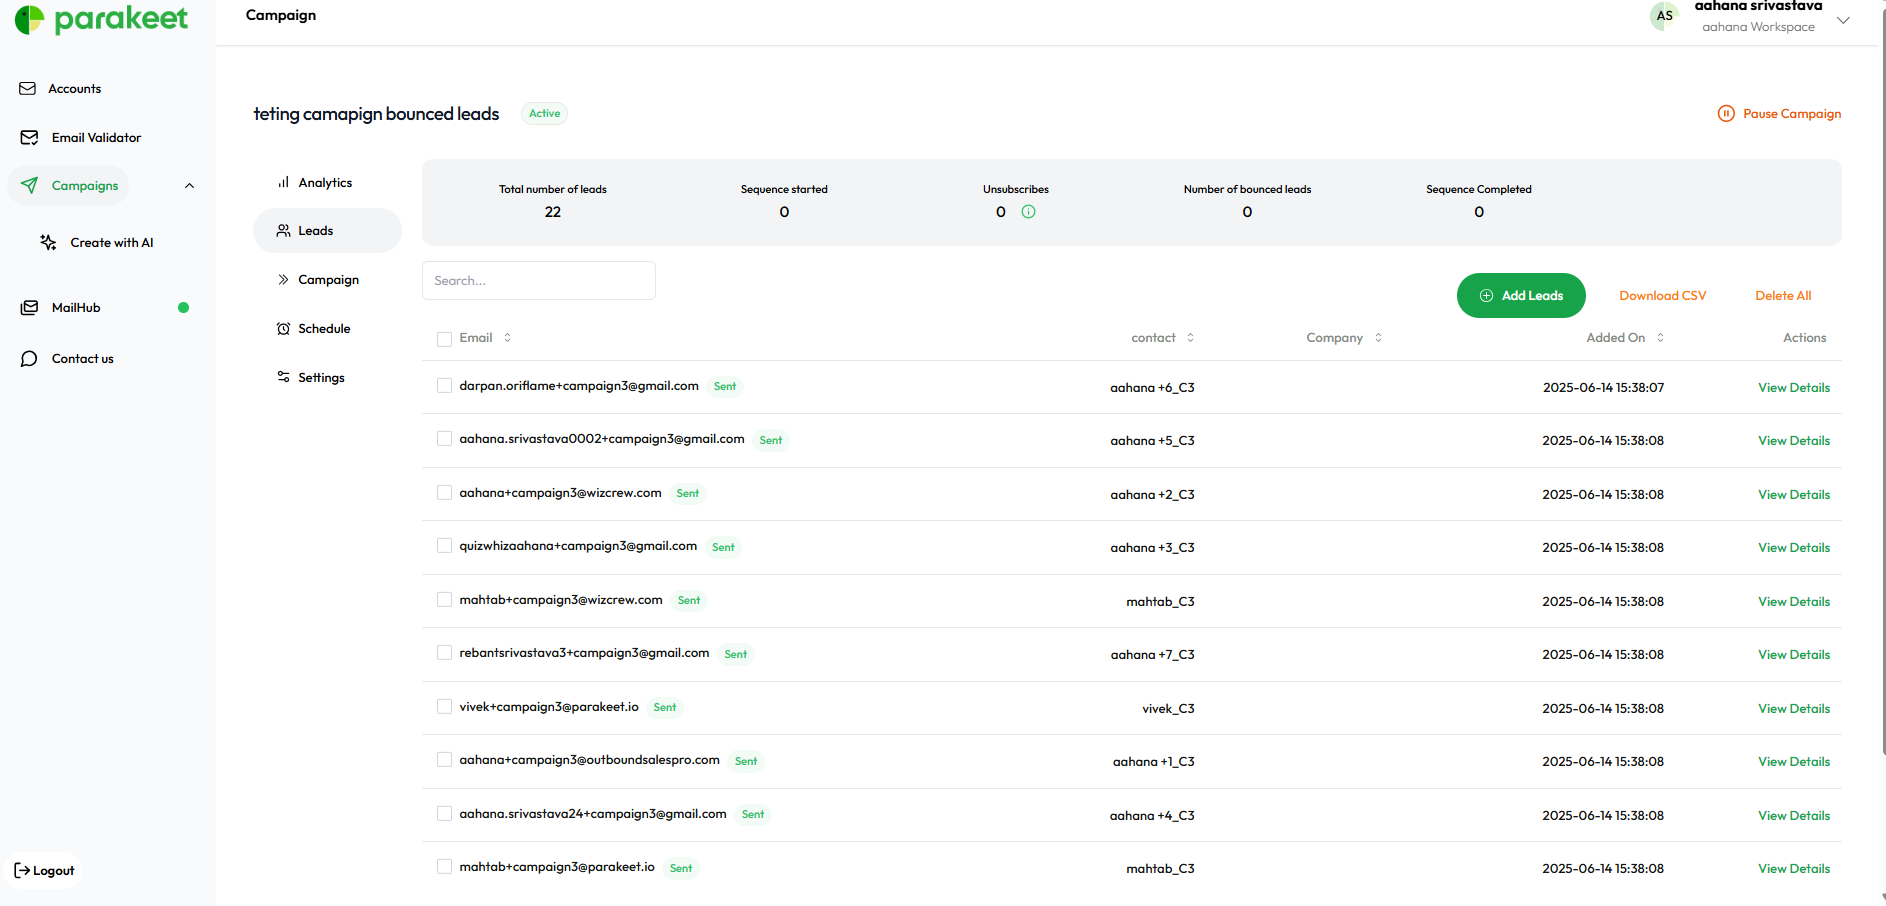
Leads Tab – Uploading and Managing Recipients
The Leads tab is used to define the recipients for your campaign.
-
Upload a list of email leads using a CSV file.
-
Drag & drop file support included.
Lead Duplication Control
-
Checkbox:
Prevent duplicate leads across all campaigns -
When checked, the system checks for any existing lead email across all other campaigns.
-
Duplicate leads will be skipped during upload.
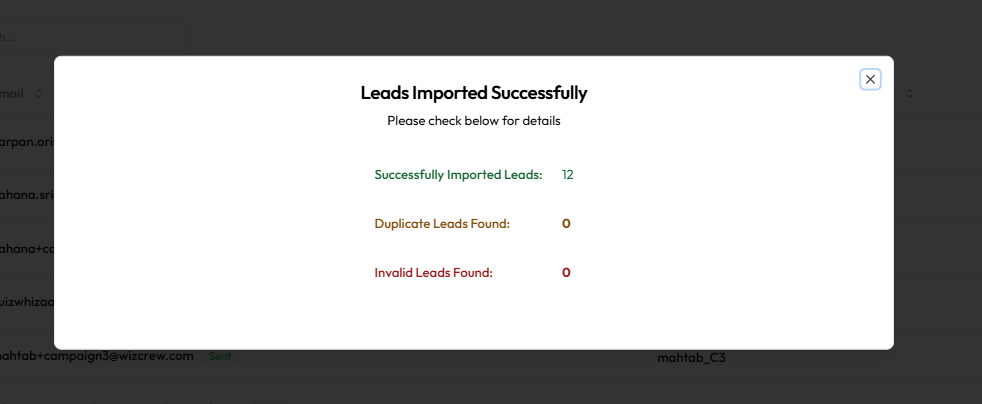
Lead Metrics Displayed
-
Total leads uploaded
-
Sequence started
-
Unsubscribed
-
Bounced
-
Sequence completed
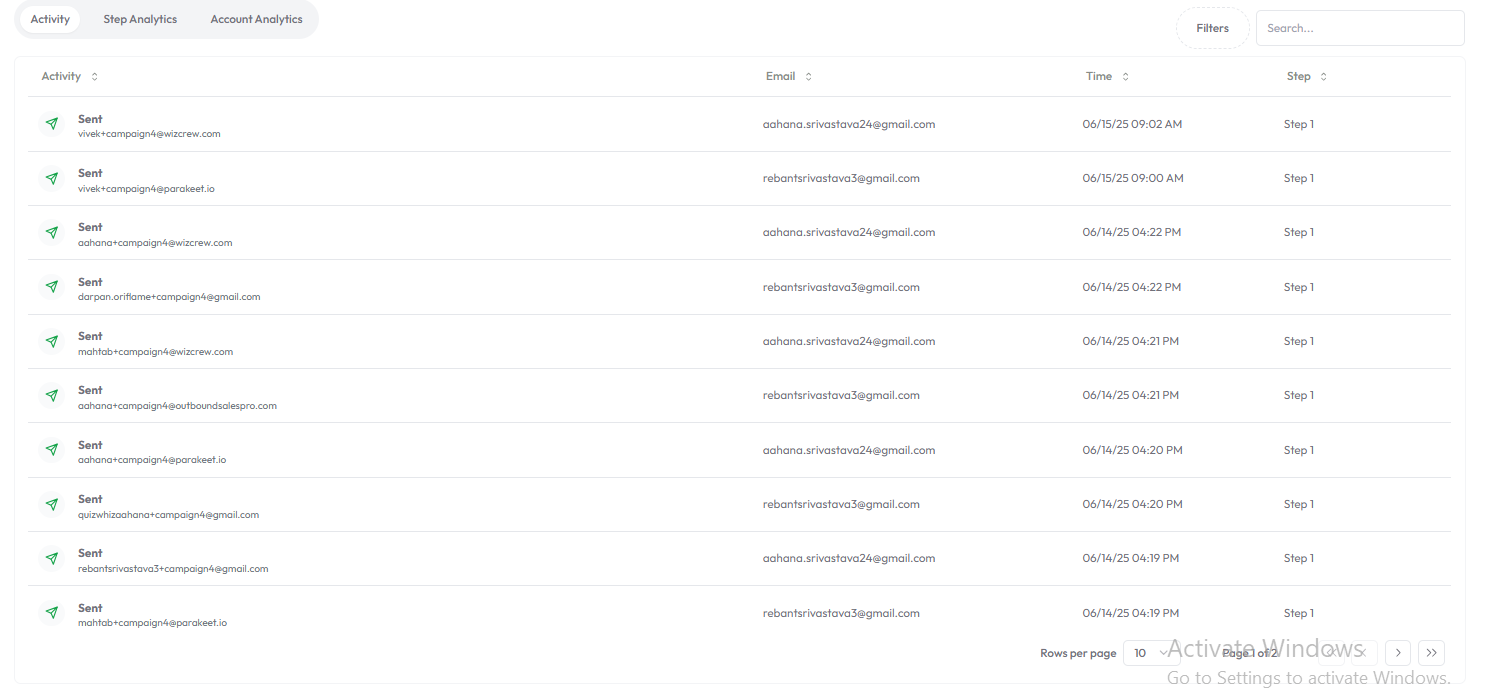
Lead Management
-
View and manage uploaded leads
-
Search, sort, and filter leads
-
View delivery status for each contact
Schedule Tab – Timing & Delivery
Defines when and how emails are sent.
-
Campaign Start Date: Set a delay to launch later.
-
Time zone: Default is
America/New York (EDT), but can be changed. -
Sending Days: Choose which weekdays to send emails (default: Mon–Fri).
-
Sending Hours: Default window is 9 AM–5 PM. Fully customizable.
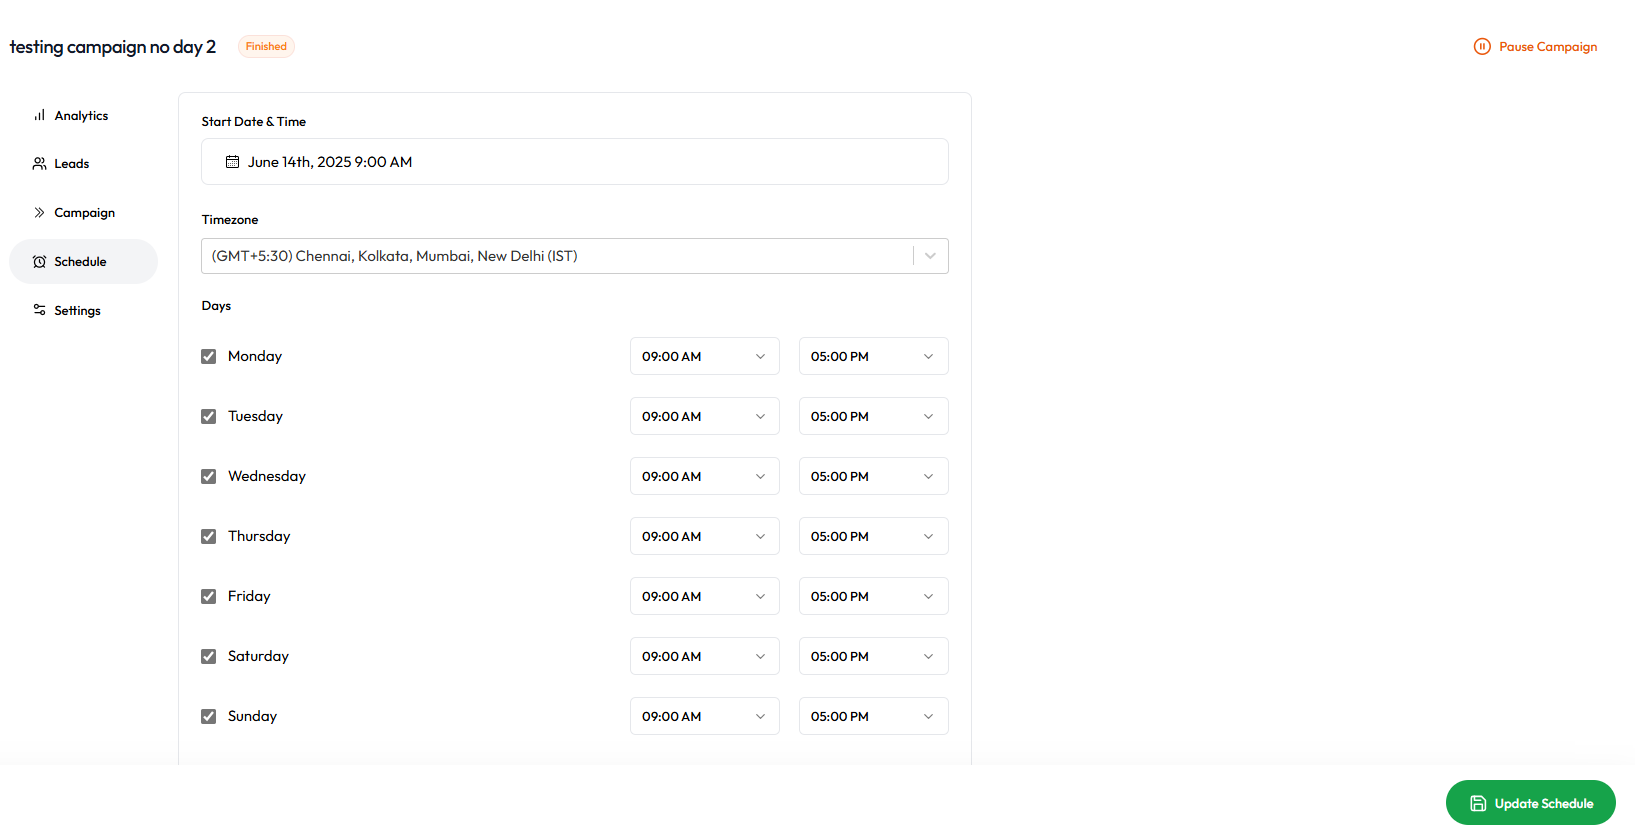
Emails will only be sent within the defined hours on active days.
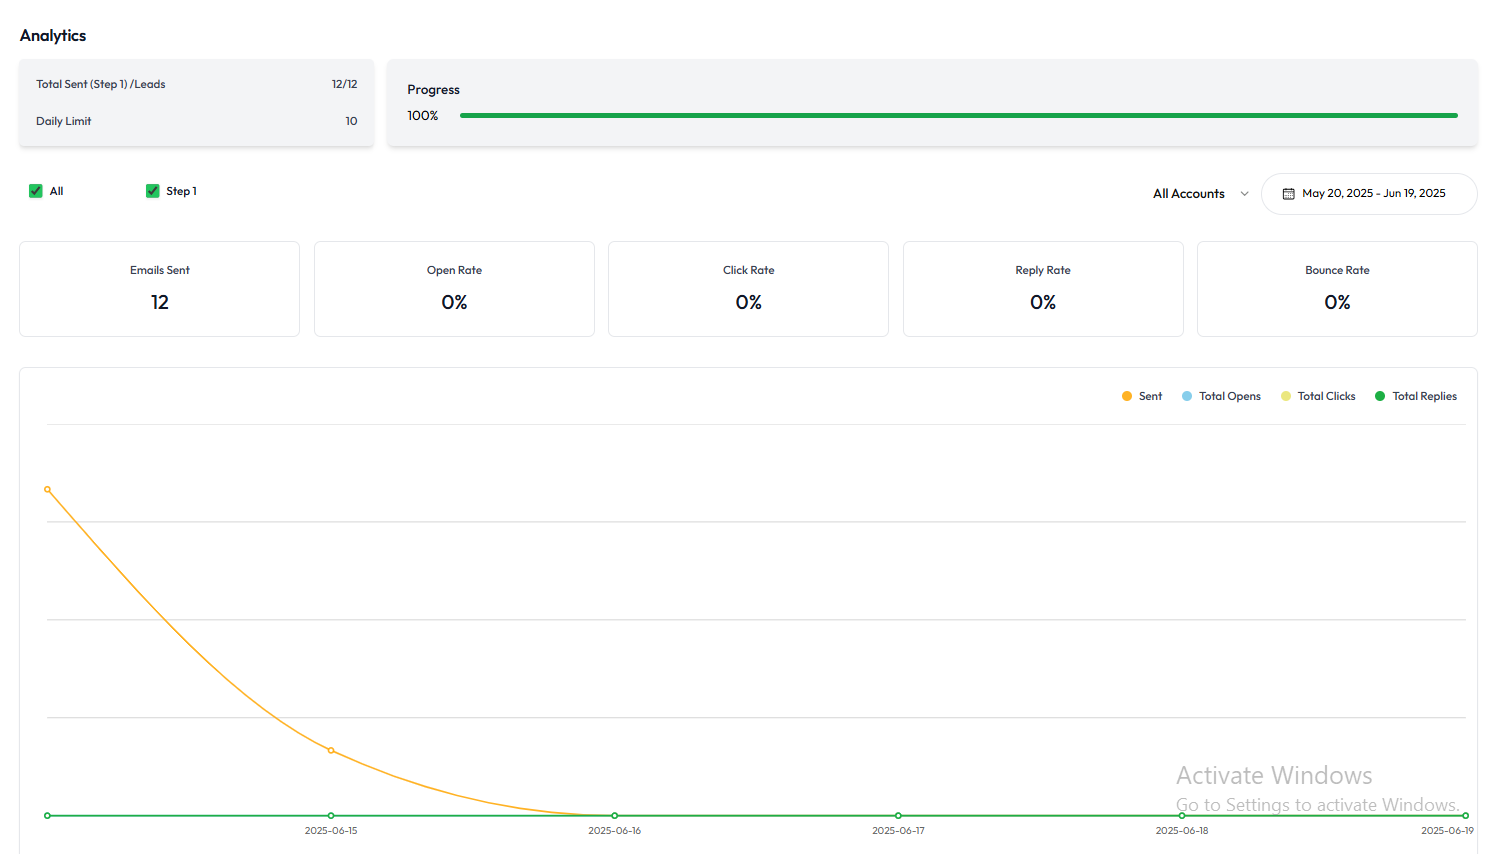
Analytics Tab – Performance Metrics
Gives a detailed view of how the campaign is performing.
-
Open Rate: Percentage of recipients who opened the email.
-
Click Rate: Percentage of recipients who clicked a link.
-
Reply Rate: Percentage of replies received.
-
Bounce Rate: Emails that were undeliverable.
-
Unsubscribed: Number of users who opted out.
Graphs, bar charts, and tables are used to visualize trends.
Settings Tab – Technical Controls
This section manages all advanced configurations for a campaign.
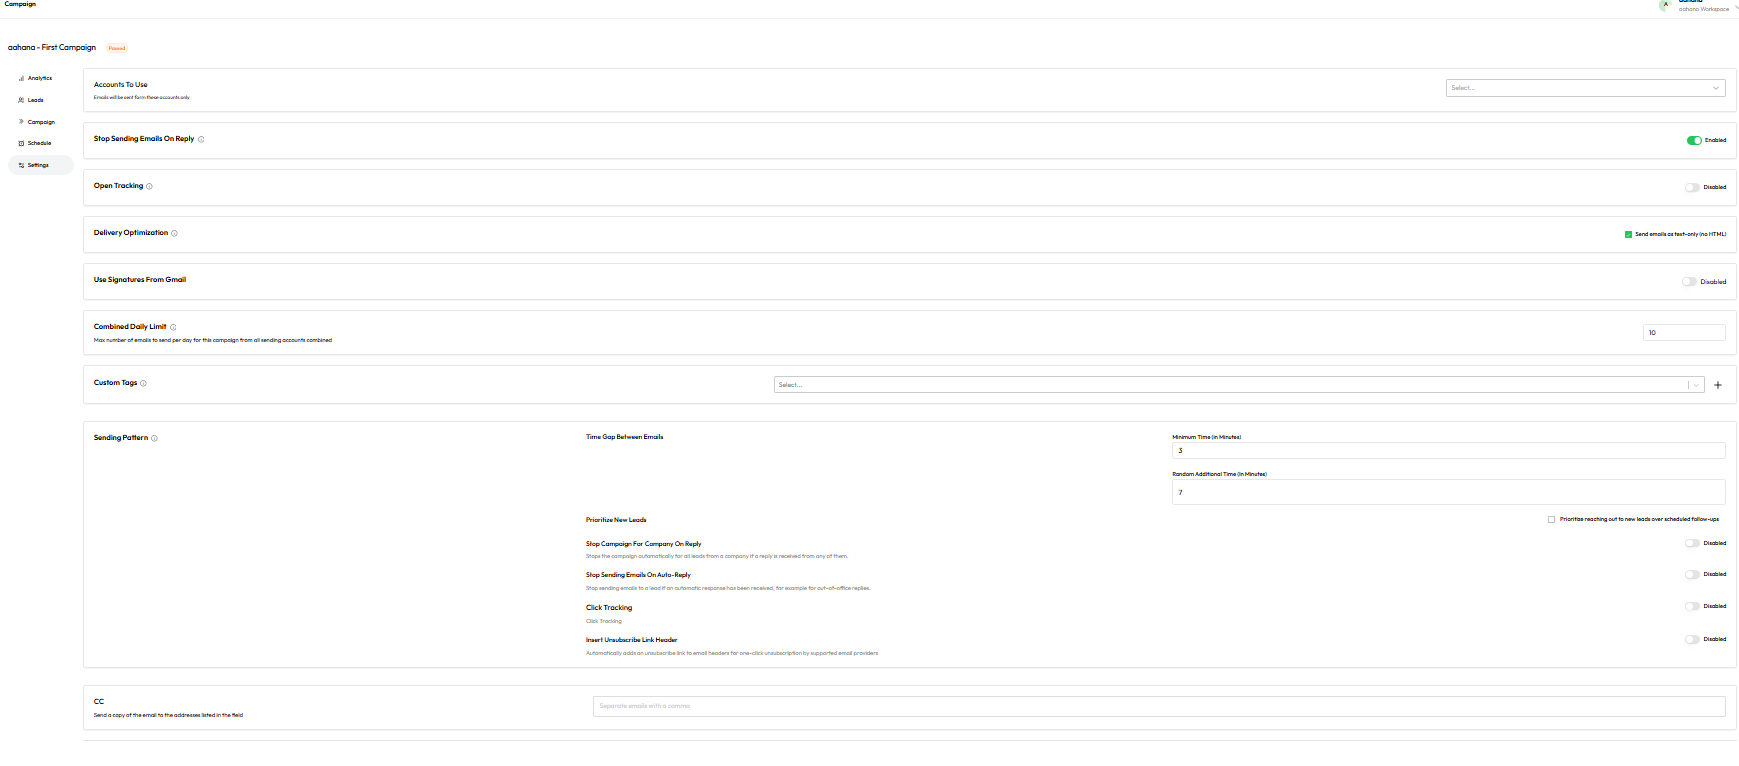
Accounts To Use
-
Select one or more connected email addresses to send emails from.
Stop Sending Emails On Reply
-
When enabled, stops all future steps if a reply is received from the lead.
Open Tracking
-
Track whether recipients opened the email.
Delivery Optimization
-
Choose to send emails in text-only format (HTML fallback).
Use Signatures From Gmail
-
When enabled, uses the sender’s Gmail signature if connected via Google OAuth.
Combined Daily Limit
-
Maximum number of emails sent per day across all selected sending accounts.
Custom Tags
-
Tag the campaign with custom labels for internal filtering and reporting.
Sending Pattern
-
Time Gap Between Emails:
-
Minimum Time (in minutes)
-
Random Additional Time (in minutes)
-
-
Optional Features:
-
Prioritize new leads over follow-ups
-
Stop campaign for a company on reply
-
Stop sending on auto-reply
-
Click tracking
-
Insert unsubscribe link header
-
CC
-
Add CC addresses (comma-separated) for receiving a copy of each campaign email.
Routing Logic Summary
| Action | User Lands On |
| Click on AI-generated campaign | Campaign tab |
| Click on manually created campaign | Leads tab |
| View existing campaigns | Campaign summary dashboard |
| Create new campaign (manual) | Starts from campaign naming → Leads tab |
| Create new AI campaign | Follows website → ICP → campaign builder flow |
Campaign page (overview)
Campaigns Module – Overview Page
This is the default landing page when a user clicks the Campaigns tab from the sidebar.
Entry Behavior
-
No Campaigns Present
If no campaigns have been created yet, the interface displays an empty state with the message:No campaigns available yet. Start by creating one.
-
One or More Campaigns Present
The dashboard displays a list of all campaigns (AI-generated or manually created) associated with the workspace. Campaigns are listed in chronological order and include essential metrics and controls.


Primary Actions Available
Users can perform the following top-level actions from the Campaigns overview:
-
New Campaign
Initiates the manual campaign creation process. -
AI Campaign Builder
Launches the AI-powered campaign creation flow using website input and ICP analysis.
Campaign Table – Data Columns
Each campaign listed includes the following columns:
| Column Name | Description |
|---|---|
| Campaign Name | User-defined name of the campaign. |
| Status | Indicates state: Active, Paused, Completed. |
| Progress | Visual indicator or numeric progress based on email sequence activity. |
| Emails Sent | Total number of emails sent for this campaign. |
| Clicks | Number of users who clicked a link in the campaign emails. |
| Replies | Number of replies received, shown as: X replies of Y sent. |
| Actions | Start, Stop, or Pause the campaign. |
| Analytics Button | Opens the Analytics tab for this specific campaign. |
| ⋯ Menu (More) | Dropdown menu offering: |
| - Edit: Modify campaign structure | |
| - Duplicate: Clone the campaign | |
| - Delete: Permanently remove it |
Campaign flow

ALL flows in detail
