AI Campaign Onboarding Flow
Purpose
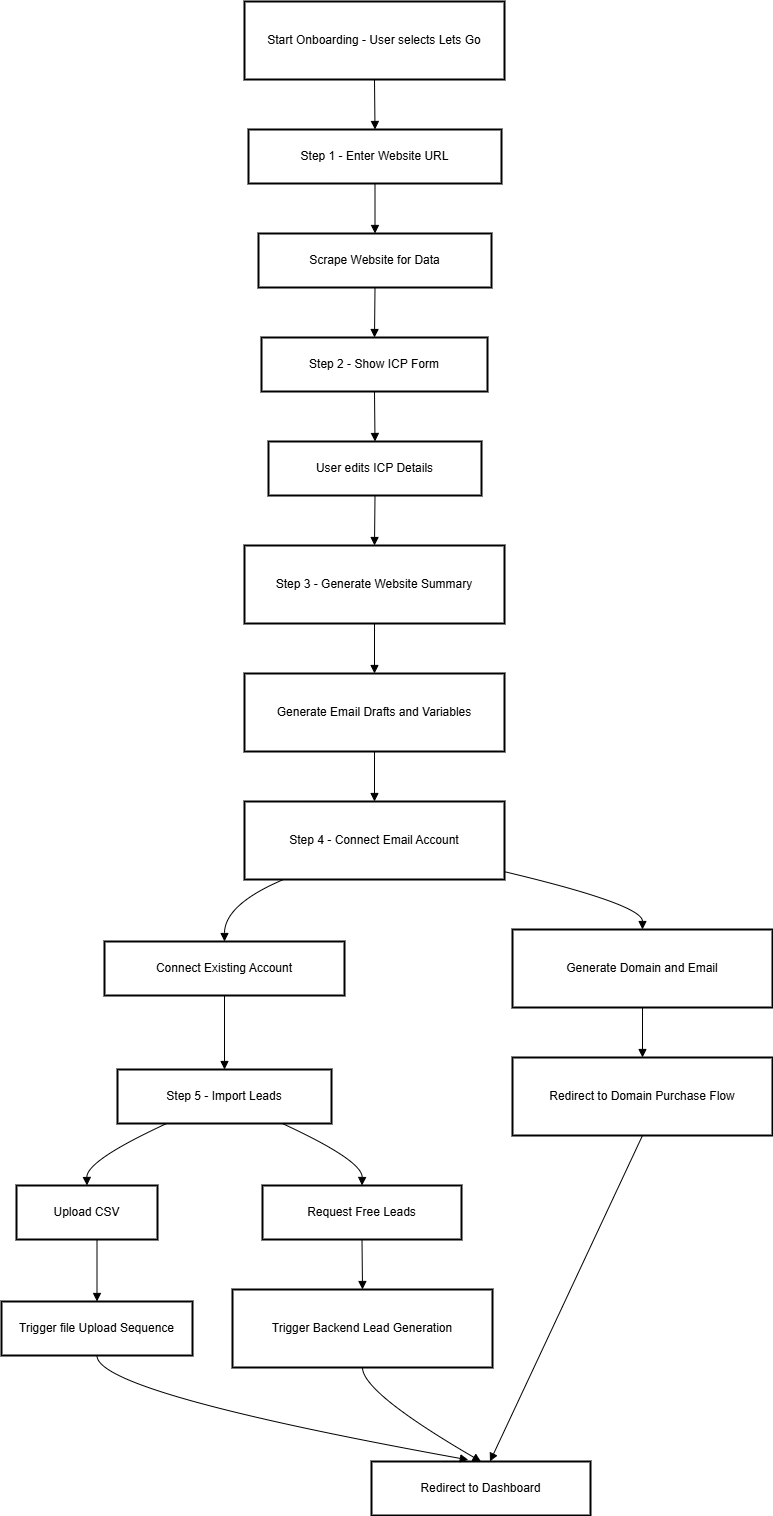
This flow guides a new user through a 5-step AI-powered onboarding sequence to set up their first campaign using automated inputs.
Overview of Steps
| Step | Action | Purpose |
|---|---|---|
| 1 | Input Website URL | Extract business details automatically |
| 2 | Fill ICP (Ideal Customer Profile) Form | Confirm/adjust scraped company data |
| 3 | Review AI Website Summary & Campaign | See AI-generated campaign draft and variables |
| 4 | Connect Email Accounts | Either generate accounts or connect existing ones |
| 5 | Import Leads | Upload a CSV of leads or request free leads for campaign execution |
Step-by-Step Flow
Step 1: Enter Website URL
-
The user inputs their website (e.g.,
example.com). -
This domain is used to scrape relevant business and ICP details.
Screenshot Placeholder
Step 2: ICP Form (Auto-Filled)
-
Displayed after scraping the domain data
-
User can review or edit the fields:
-
Industry
-
Target Audience
-
Company Size (⚠️ Currently allows multiple selections — should be single-select)
-
Screenshot Placeholder

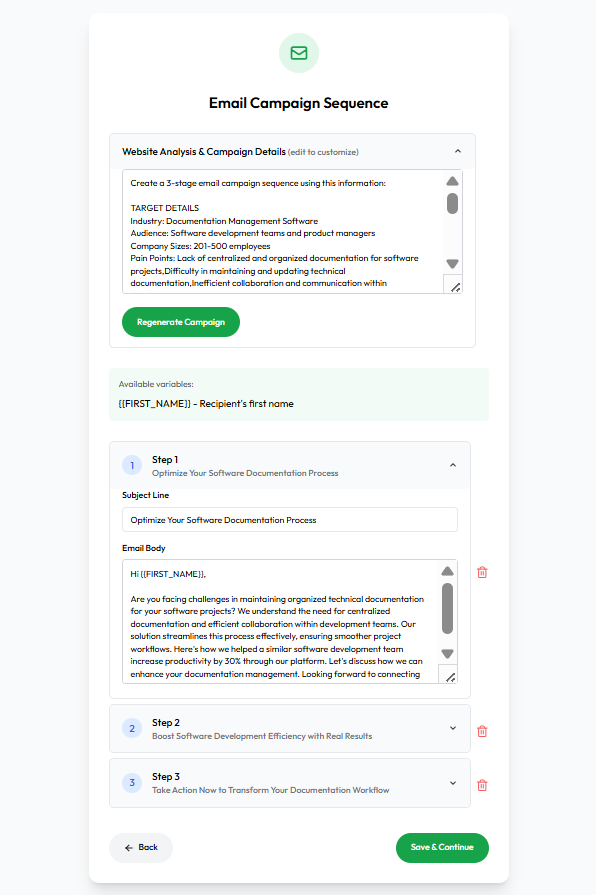
Step 3: AI Website Summary & Email Campaign
-
Displays:
-
Website summary (based on scraping)
-
A 3-step cold email sequence with subject lines and editable body
-
Available merge variables like
{FIRST_NAME},{COMPANY_NAME}, etc
-
Screenshot Placeholder
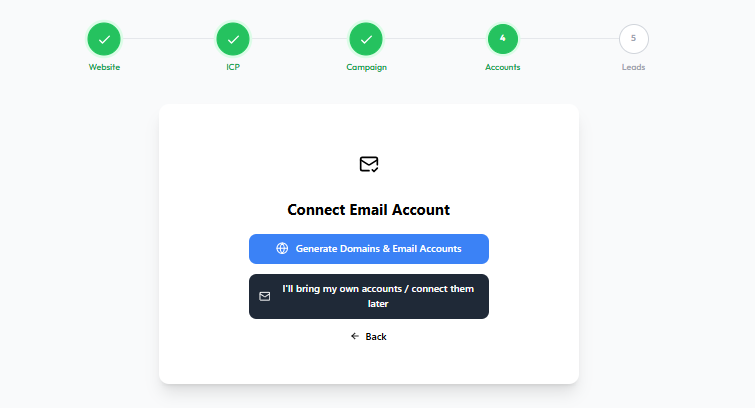
Step 4: Connect Email Account
-
User is prompted to either:
-
Generate Domains & Email Accounts (redirects to domain purchase flow)
-
Connect Existing Accounts (OAuth or manual configuration)
-
Screenshot Placeholder
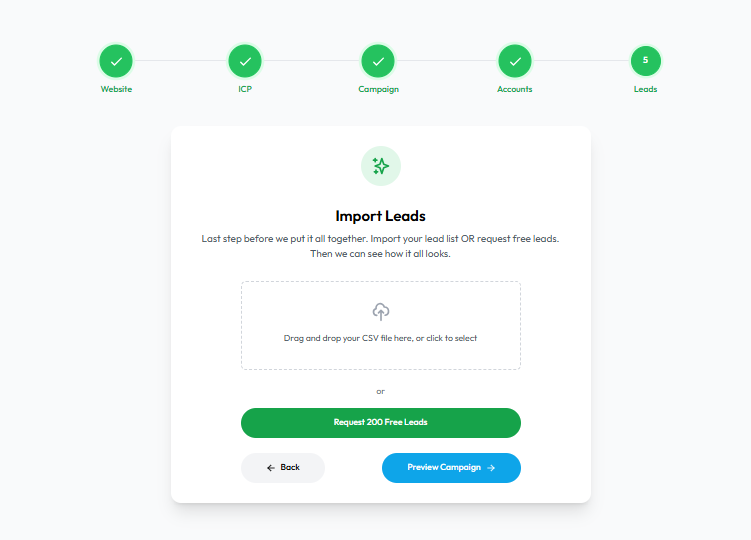
Step 5: Import Leads
-
Options available:
-
Upload lead list via CSV
-
Request 200 free leads
-
-
This step concludes the flow and redirects the user to the dashboard.
Screenshot Placeholder
No comments to display
No comments to display